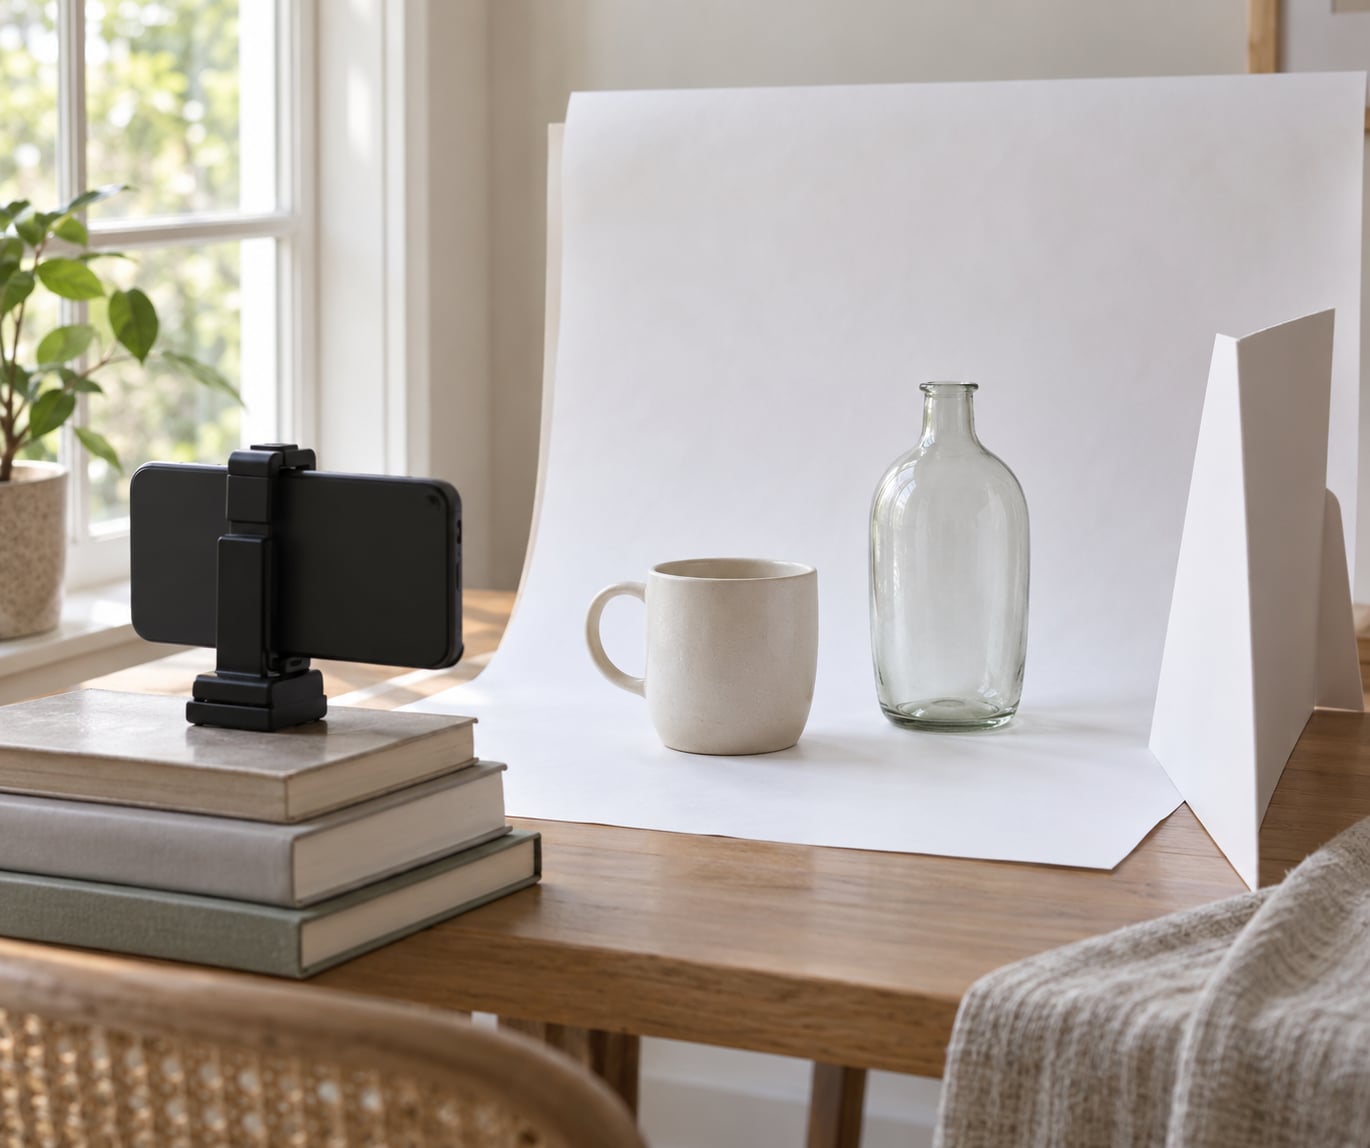
You can shoot a clean, professional-looking ecommerce product photo at home with a phone, a plain table, a piece of white paper and a window. Set up one soft light source, keep the camera on a fixed tripod position, shoot the same five angles for every product, then make the same small edits each time. That whole routine takes about 20 minutes per item once you have done it twice.
Product photography is just commercial still-life photography: controlled light, a clean surface, and enough shots that a shopper can judge the item from every side. Nothing about it requires a studio, as long as you stop treating the image as a one-off and start treating it as a repeatable process.
Table of Contents
- What You Need to Shoot an Ecommerce Product Photo at Home
- Step-by-Step: Seven Steps From Setup to Export
- Step 1: Choose the Right Surface and Background
- Step 2: Prepare the Product and Control Reflections
- Step 3: Set Up Soft, Even Lighting
- Step 4: Set the Camera for Sharp, Accurate Images
- Step 5: Frame and Capture Multiple Angles
- Step 6: Review the Photos Before Editing
- Step 7: Edit Consistently and Export for Ecommerce
- Common Mistakes and How to Fix Them
- Frequently Asked Questions
- Can I take good ecommerce product photos with my phone?
- What background is best for ecommerce product photos?
- How do I take pictures of shiny products without glare?
- How much light do I need to photograph products at home?
- Should I use natural light or artificial light?
- How do I make multiple product photos look consistent?
- Start With One Product, Not Ten
What You Need to Shoot an Ecommerce Product Photo at Home

You need four things: a camera, a flat surface, one large soft light and a white background. Everything else on a photographer’s list is a later upgrade.
| Item | What it fixes | Zero-cost swap |
|---|---|---|
| Camera (phone or mirrorless) | Sharpness and color accuracy | Use the rear camera, never the front-facing one |
| Tripod or phone clamp | Wobble and inconsistent framing between shots | Stack books to the exact camera height and prop the phone against them |
| Large soft light | Harsh shadows and glare | A north-facing window with a sheer curtain or frosted contact paper on the glass |
| White background | Gray, uneven backdrops | White poster board or a folded sheet of foam board |
| White reflector card | Shadows on one side of the product | White printer paper or a sheet of white foam core |
| Measuring tape or ruler | Distorted perspective on small products | Any fixed-width object you can measure with |
| Editing app | Color casts, dust, stray marks | The free editor built into your phone gallery |
| Tape | Backgrounds lifting or curling | Any low-tack tape, applied to the back of the board |
The white reflector is the item people skip and then wonder why one side of their product looks darker. White card fills the shadow side back toward the light. If you need to deepen a shadow deliberately, use black foam board on purpose rather than losing half the product to it by accident.
Optional upgrades, in the order they actually earn their keep: a second light to kill the shadow side entirely, a continuous LED panel with a diffuser for evening shoots, a circular polarizing filter for reflective surfaces, and a macro lens or close-up filter for detail shots of jewelry and fabric. Add them one at a time, and only when a specific product gives you trouble.
If your space has no usable window light at all, a basement or a rented apartment, build a light tent instead: cut two white foam core boards into a U, stand it on a table next to a single light source, and shoot through the open front. That recipe comes up constantly in seller communities for exactly this situation.
Step-by-Step: Seven Steps From Setup to Export
Step 1: Choose the Right Surface and Background
Pick a surface that is flat, matte and a color your product does not already own. White paper is the safest default because most marketplaces require a pure white background on the main image.
Contrast matters more than people expect. A cream ceramic mug disappears on a cream sweep, and a matte black speaker vanishes against matte black. When the product and background are close in tone, separate them by changing the surface color or by adding a shadow line between them.
Catalog images sit on a plain background and show the whole item. Lifestyle images place the product in a setting where someone would actually use it, which is what stops a shopper from guessing about size and context. Most listings need both, and the catalog shot is the one platform rules care about.
For a continuous background, roll out white or light gray paper, curve it where it meets the table, and tape the curve from underneath so no tape line is visible in frame. Two pieces of poster board leaning against each other make a fine free version of the same thing.
Step 2: Prepare the Product and Control Reflections
Clean the product before it goes on the set, not after. Dust, fingerprints and lint are the single most common reason a photo looks cheap.
Use a microfiber cloth on glass and gloss finishes, and a lint roller on fabric. Steam a wrinkled garment or let it hang on a hanger overnight. Wipe the product’s base so it does not drag a dirty shadow across the sweep.
Reflections are a geometry problem, not a software problem. Every shiny surface shows whatever is in front of it, which usually means you and your phone. Move the light large and close so it fills that reflection with white rather than with your face, and place a white card opposite it to control what the surface sees.
For glass and liquids, put something white inside or behind the product so light passes through it. Backlighting a bottle against a white card is what makes it glow rather than read as a dark silhouette.
Step 3: Set Up Soft, Even Lighting
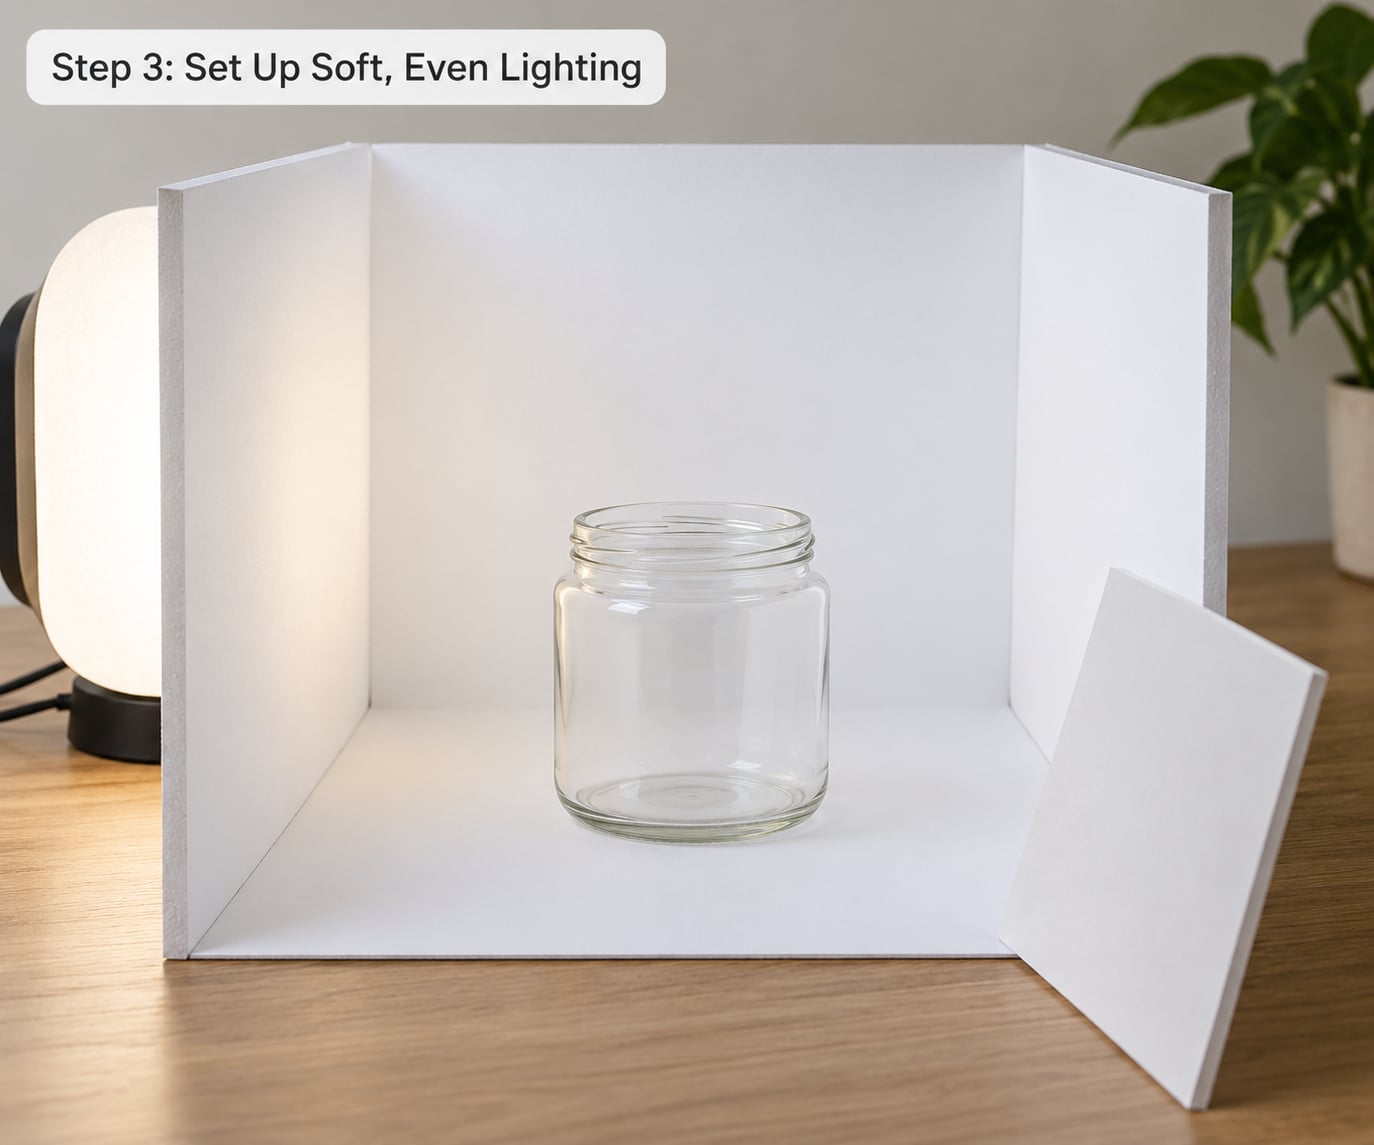
One large, soft light placed to the side and slightly above the product gives you the shadow you want and the shadow you can live with.
Softness comes from size and distance, not from buying a more expensive lamp. The further a light sits from the product, the larger it appears from the product’s point of view, and the softer its shadows get. A single sheet of white paper taped over a lamp turns a hard hotspot into a usable source.
Window light is free and lovely, but it shifts. If you shoot a catalog across several days, the color and intensity will drift, and that drift is visible when a shopper scrolls the gallery. Either shoot the whole batch in one session, or use a fixed artificial source for anything you need to look consistent.
Two lights beat one when the product has real dimension. Put the key light at roughly 45 degrees to the side and above, then use a weaker fill or a white card on the opposite side at half the strength. If the fill is too strong, the product goes flat and loses all its shape.
Two lights are not automatically better. A single large soft source produces the clean, dimensional look most product pages aim for, and it is far easier to repeat exactly.
Step 4: Set the Camera for Sharp, Accurate Images
Turn off automatic everything. Auto ISO, auto white balance and auto focus will make every shot slightly different, and consistency is what makes a catalog look professional.
On a phone, switch to the manual or pro mode, set ISO as low as the light allows, and lock exposure and white balance before the first frame. On iPhone, long-press the screen to lock exposure and focus on the product, then tap the sun icon and slide it slightly negative to protect highlights on white backgrounds. Use a Bluetooth remote or the volume-button timer instead of touching the phone, because tapping the screen changes focus.
On a mirrorless or DSLR, ISO 100 to 200, aperture around f/8 to f/11 for full sharpness across the product, manual focus with a magnified view, and RAW capture if you have disk space and edit in Lightroom or a free equivalent.
| Scenario | ISO | Aperture | Shutter | White balance | Format |
|---|---|---|---|---|---|
| Full product on white | 100-200 | f/8 to f/11 | Anything the tripod allows | Daylight or custom | RAW |
| Close-up detail shot | 100 | f/11 to f/16 | Tripod required | Daylight or custom | RAW |
| Lifestyle shot with a model | 200-400 | f/4 to f/5.6 | 1/125s or faster | Daylight | RAW |
The reasoning behind those numbers is short. A wide aperture gives a shallow depth of field, so only a thin slice of the product is sharp, and on a 4-inch tall item that slice can be a few millimeters. Stopping down keeps the whole object crisp. A low ISO keeps grain out of a flat white background, where grain reads as dirt. A tripod frees the shutter to run slow in low light, which lets the ISO stay low. In a room where you cannot get enough light, do not raise the ISO and call it a style choice.
Shoot in RAW so you have room to correct color later, and export sRGB for the web. Keep your files in the largest format your camera offers and crop down afterward; you cannot add detail back to a compressed file.
Step 5: Frame and Capture Multiple Angles
Mark the tripod position with a piece of tape on the floor and never move it. Then rotate the product, not the camera, and every frame stays consistent.
Measure your camera distance against the product’s largest dimension. Standing a phone too close makes a small object balloon and distort, and a 50mm-equivalent lens keeps proportions honest. For very small items, step back and crop in.
Shoot in the largest resolution available, leave a little empty space around the product, and never crop tight on the edge of something you might need later.
| Shot | How many | Angle | What it answers for the shopper |
|---|---|---|---|
| Hero on white | 1 | Straight on, eye level | What does it look like, exactly? |
| Detail close-ups | 3 | Straight on, macro distance | What is the texture, stitching, finish or mechanism like? |
| Side and back | 2 | Rotated 90 and 180 degrees | What is on the other sides? |
| Scale reference | 1 | Product beside a known object or person | How big is it in real life? |
| Lifestyle or in-use | 1 to 2 | Natural setting, slight angle | Where does this fit in my life? |
| Flat lay | 1 | Straight down | What is included in the box or set? |
Seven to eight images per product is a sensible target, and most of the time you can shoot them in under ten minutes once the set is standing. Apparel on a hanger needs front, back and a close-up of the label and fabric. Jewelry and watches need one clean shot plus two tight details. Furniture needs the scale shot more than anything else.
Amazon requires the main image to sit on a pure white background that fills the frame, with the product occupying roughly 85 percent of it. Google Merchant Center and most storefronts are more forgiving but still reject images that are too small, too dark or watermarked. Check the current rules on each platform you sell through before you batch edit, because they change.
Step 6: Review the Photos Before Editing
Review at full size before opening any editing app, and reject anything that fails the basics.
Zoom to 100 percent on the sharpest edge of the product and check for motion blur. Check the histogram for clipped highlights on white surfaces. Look for color casts, especially a green or magenta tint from mixed indoor bulbs. Look for dust specks, fingerprints, lint and scratches. Confirm the background is even and the product is centered.
Ask one question about each frame: does this image tell the shopper something the others do not? If not, it does not belong in the gallery.
Consistency checks matter as much as individual quality. Compare two shots side by side and confirm the background tone, the shadow direction and the product’s position in frame match. That is the boring check that makes a catalog read as a set rather than a pile.
Step 7: Edit Consistently and Export for Ecommerce
Make the same small set of corrections to every image from the same product: exposure, white balance, contrast, crop and sharpening. That is the whole editing job for a clean setup.
Start with white balance so the product’s color is true, then pull exposure until white reads as white without clipping. Add contrast gently, straighten the crop, and apply modest sharpening to the product’s edges only. Snapseed on mobile and the free Adobe Lightroom editor on desktop both cover this in a few minutes.
Leave the true color of the product alone. A warmer, brighter, more saturated version than the real item sends expectations up, and returns follow. Dust removal is fair game. Reshaping a product’s proportions is not.
Export as sRGB JPEG at the largest size your platform allows, usually around 2000 pixels on the longest side for storefronts and 1600 pixels or more for marketplaces. Compress before uploading so the page stays fast, but not so hard that edges go blotchy on a high-density screen. Keep your RAW and full-resolution files in a folder per product so you can re-export later without reshooting.
If you shoot a batch, make the folder structure boring and exact: one folder per product, one subfolder per angle, filenames like sku-front-01.jpg. Future-you will thank you the first time a listing needs a new image.
Common Mistakes and How to Fix Them
Most homemade-looking product photos come from one of seven things. Each has a quick fix.
- The background comes out gray. The camera meters for white and underexposes it. Add a second light or a reflector on the background, or raise exposure in editing until white reads white without losing detail in the product.
- Mixed lighting changes color between shots. You used a window on one side and a ceiling bulb on the other. Turn off every light except one source, then work from that single source for the whole session.
- The product looks distorted. The camera was too close. Step back, use a longer focal length and crop in, and check framing with a ruler rather than by eye.
- Shadows are harsh and black. The light is too small or too close. Move it further back, diffuse it with white paper or fabric, and place a white card on the shadow side.
- The product looks flat. You filled both sides equally. Keep the key light at roughly 45 degrees, then weaken or remove the fill so one side stays darker than the other.
- The frame is cluttered. Too many props, or props that compete with the product. Style props should show scale or use, never cover a feature the shopper needs to see.
- The edit looks overdone. Heavy saturation, aggressive sharpening and strong filters are the giveaway. Cut saturation, halve the sharpening, and compare the edited image against the real product before uploading.
One more worth naming: shooting an entire catalog over several weeks without fixing your process. Sellers describe it as exhausting, and the result is a gallery where every product has a different shadow and a different background tone. Batch it instead, and keep the light and camera position identical.
Frequently Asked Questions
Can I take good ecommerce product photos with my phone?
Yes. A recent phone in manual or pro mode, mounted on a tripod or a stack of books, with one large soft light and a white paper background produces images that match most budget camera setups on a storefront. Use the rear camera, lock exposure and focus on the product, shoot in the largest resolution available, and avoid the 2x lens on small items because it distorts their proportions.
What background is best for ecommerce product photos?
A plain white or light neutral surface is best for the main catalog image because marketplaces such as Amazon require a pure white background that fills the frame. Use a rolled paper sweep or two leaning foam core boards to remove the horizon line. Lifestyle images can use a real surface, but keep it visually quiet so the product stays the focus.
How do I take pictures of shiny products without glare?
Make the light bigger and put it closer to the product, so the reflection it creates in the surface is plain white instead of your phone or face. Place a white card opposite the light to control what the surface sees, and never use bare on-camera flash, which puts a small hard reflection in the middle of the product. A circular polarizing filter helps with metal and gloss if you own one.
How much light do I need to photograph products at home?
Enough light to keep ISO at 100 or 200 on a tripod, which in practice means one window with a sheer curtain or one diffused lamp. Bright, indirect daylight works better than more lamps, and it is free. If your room is dark, build a foam core lightbox around a single light source rather than adding several cheap lights that fight each other.
Should I use natural light or artificial light?
Use natural light for speed when you can control the room, and artificial light when consistency across a whole catalog matters more. Window light shifts during a shoot and from day to day, which is visible when someone scrolls a gallery built over several sessions. A fixed diffused lamp plus white cards gives you the same result every time you press the shutter.
How do I make multiple product photos look consistent?
Lock your process rather than your edits. Tape a mark on the floor for the tripod position, keep one light source in one spot, measure camera distance against the product, and apply the same edit to every image from the same session. Consistent background tone, shadow direction and framing do more for a catalog than any amount of individual retouching.
Start With One Product, Not Ten
Put one product on a white surface by a window, tape a mark on the floor for your tripod, and shoot the seven-shot list in one session. Review the frames side by side, apply the same edit to all of them, and export. Once that runs cleanly for one item, the process scales to a catalog.
That is the whole method behind how to shoot an ecommerce product photo at home: one soft light, one fixed camera position, a repeatable shot list, and edits that match. Repoint your setup for each new product and the gallery stays consistent, which is the part shoppers notice.
Updated for 2026.