Shortening a blazer sleeve is a small alteration with a big effect, and there are three ways to do it: fold the sleeve and secure it with no stitching at all, take the excess out permanently by hand or machine, or hand the job to a tailor for a clean invisible finish. The whole thing takes under an hour once you know which blazer you are holding. Every route comes back to one decision: what is your blazer made of inside.
Before anything else, put the blazer on, button it, and check that the body fits the way you want. I have taken in sleeves on jackets where the whole torso was wrong underneath, and the result looked worse than leaving it alone. If the shoulders, chest or waist are off, altering the sleeves will not fix that. Sleeve length is the easiest and least expensive fix in tailoring, precisely because it is a straight hem and nothing else.
Table of Contents
- The Short Version: Five Steps for a Blazer Without Working Buttonholes
- What You Need
- For all three methods
- For the sewing method
- What if you have none of this
- Step-by-Step: How to Shorten Sleeves on a Blazer
- How to Shorten Sleeves on a Blazer with a No-Sew Fold
- How to Shorten Sleeves on a Blazer by Sewing
- Fabric notes worth two minutes of your time
- How to Finish a Sleeve After Shortening
- Choosing a Professional Alteration
- Common Mistakes
- Common Mistakes to Avoid
- Frequently Asked Questions
- Can I shorten blazer sleeves without sewing?
- How much should I take off a blazer sleeve?
- Should I shorten a blazer sleeve at the cuff or from the shoulder?
- Can a tailor shorten sleeves with cuff buttons?
- How do I keep the lining from showing when shortening a sleeve?
- What is the best sleeve length for a blazer?
- Conclusion
The Short Version: Five Steps for a Blazer Without Working Buttonholes
This is the method that suits most off-the-rack, thrifted and vintage blazers.
- Mark the length. Wear the blazer and pin the sleeve so it ends about a quarter inch above your wrist bone, leaving a sliver of shirt cuff visible.
- Remove the buttons. Take off any decorative cuff buttons with a seam ripper, and note how they were sewn on.
- Open the lining. Turn the sleeve inside out and use a seam ripper to open the interior lining seam for roughly the length of the alteration.
- Cut and fold. Measure the excess, mark the new hem with tailor’s chalk leaving room for the fold allowance, then cut the outer fabric and the lining along that line.
- Hem and finish. Fold the new hem, press it with an iron, stitch it down, hand-sew the lining closed, and reattach the buttons.
All five steps assume the cuff has no functioning buttonhole. That single detail decides whether this is an easy afternoon job or a job you should hand to someone else, and we get to it below.
What You Need
You do not need much, and most beginners already own it. Group the tools by which method they belong to so you can skip what you will not use.
For all three methods
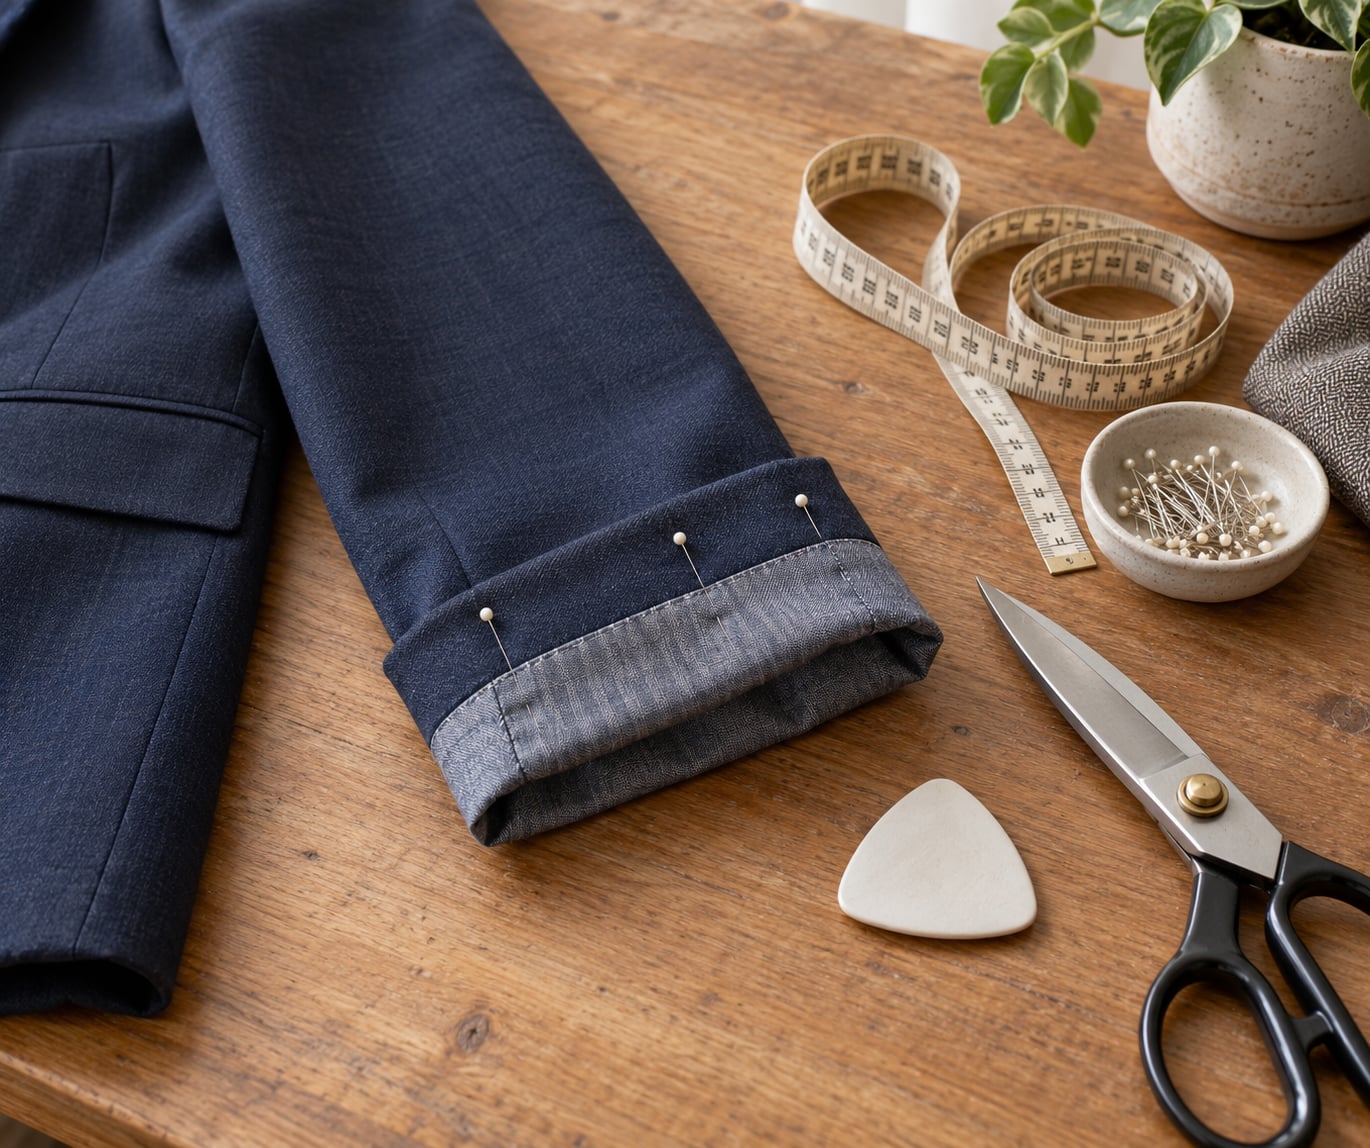
- Measuring tape — a soft one you can wrap around the wrist beats a rigid tape.
- Straight pins — for pinning the sleeve length while you are wearing the garment.
- Tailor’s chalk or a fabric marker — chalk is kinder to wool and knits because it brushes out.
- The care label — read it before you press anything. Some wool and viscose blends must not be ironed directly.
For the sewing method
- Hand-sewing needle and all-purpose thread, or a machine needle and thread if you own a machine.
- Seam ripper — the single most useful tool in this job, and the hardest to substitute for.
- Sharp fabric scissors with a good length of blade, so you can cut a long line without a staircase edge.
- Iron plus a pressing cloth — a clean cotton tea towel works.
What if you have none of this
No seam ripper means a small sharp knife or the tip of a letter opener, used carefully. No scissors means a very sharp rotary cutter on a self-healing mat. No chalk means a few short tailor’s tacks, which you can unpick later and which also hold the fold in place while you stitch. No iron means the hem will be a little lumpy, which is exactly the tell that a blazer sleeve was shortened at home.
Step-by-Step: How to Shorten Sleeves on a Blazer
Which method you need depends entirely on how your blazer is built. This table covers the constructions you are most likely to be holding, from a thrifted find to a structured suit jacket.
| Your blazer | How to tell | Best method |
|---|---|---|
| Unlined blazer | You can see shell fabric all the way through; it feels light and drapes easily | Hand-sew the hem. This is the easiest case there is. |
| Fully lined blazer | A slip of fabric hangs loose inside the sleeve when you turn it out | Open the lining seam, hem both layers, close the seam |
| Decorative cuff buttons | The button has no matching buttonhole, or the holes are stitched shut | Any of the three methods works; remove and reattach the buttons |
| Working buttonholes | The buttonhole is open and the button actually goes through it | Tailor, or shorten from the shoulder seam |
| Sleeve vent | A small stitched opening near the inner cuff, sometimes with a button above it | Keep the vent above the new hem line, or fold around it carefully |
Note the third row. Most cuff buttons on a blazer are decorative, and removing and reattaching them is straightforward. Working buttonholes are the exception, not the rule, and the difference matters enormously.
Sleeve vents deserve their own warning. A vent is a small opening at the inner cuff that lets the sleeve open over a watch or a hand, and it usually finishes with a mitered corner. If you cut below the vent, you destroy it. If you cut above it, the vent now sits lower on the arm and looks wrong. Either way, cutting a vented sleeve is a job worth handing to a tailor.
How to Shorten Sleeves on a Blazer with a No-Sew Fold
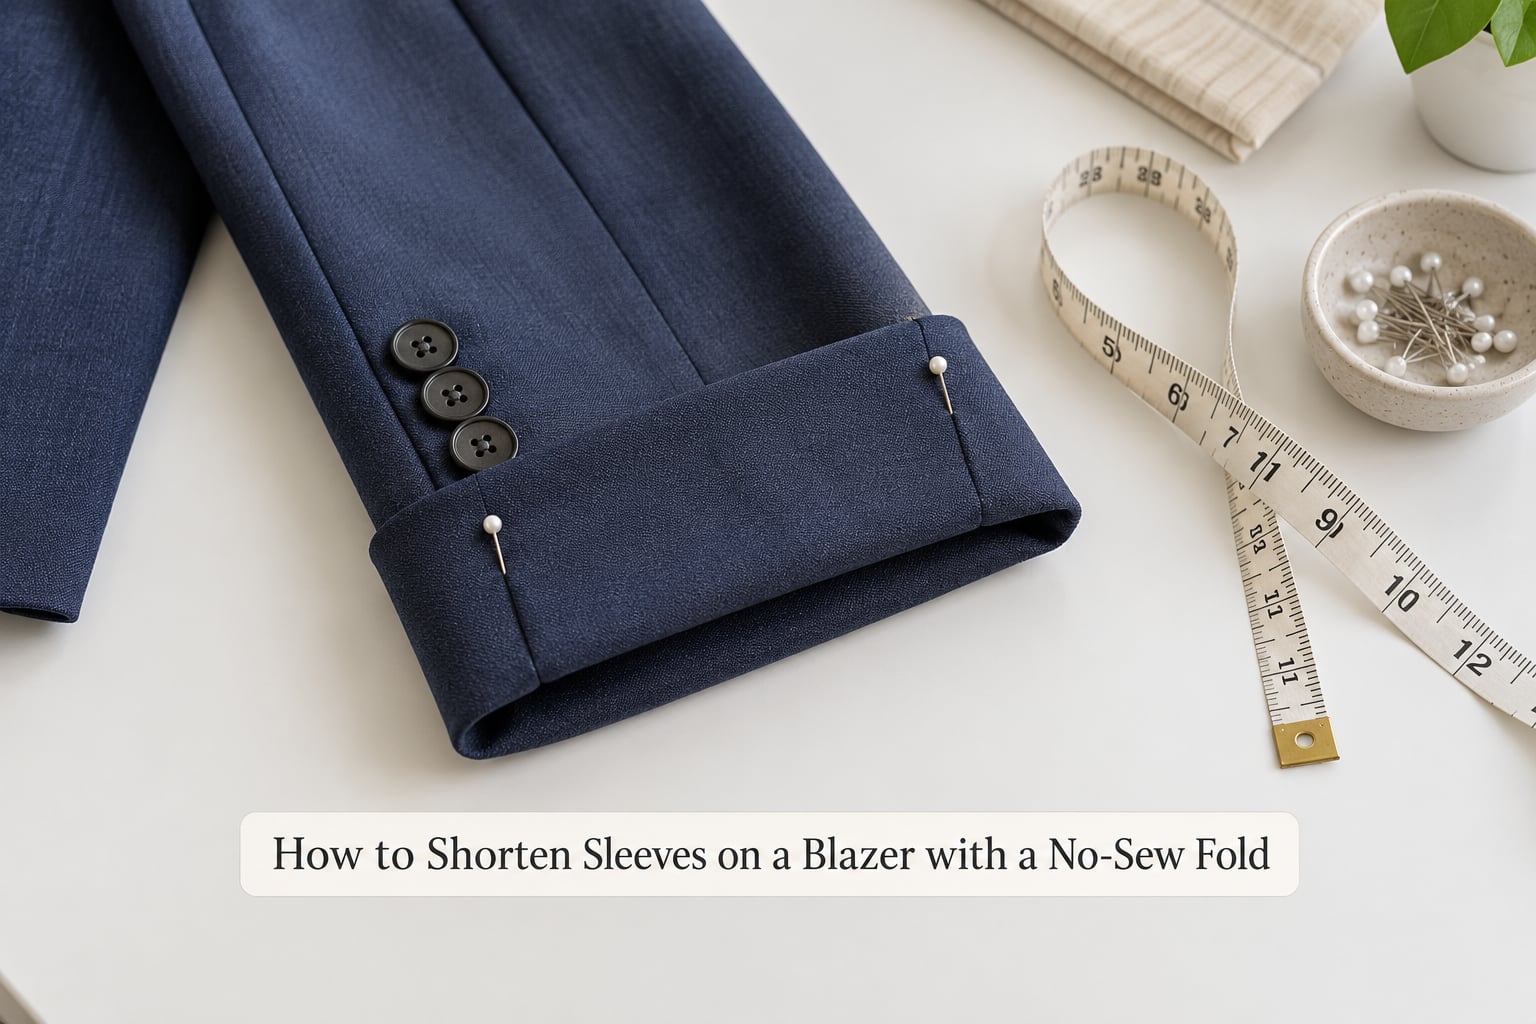
You can shorten a blazer sleeve temporarily by folding the excess upward on the inside of the sleeve and securing it with pins, a safety pin, or a small button elastic. Nothing is cut, so it is completely reversible, and it takes about five minutes.
Wear the blazer and decide where you want the sleeve to end. Pin the fold at that point, with the excess gathered to the inside so it never shows from the outside. Put the blazer back on and walk around. If the sleeve now sits a quarter inch above your wrist bone, you have your length.
The failure mode is bulk. A blazer sleeve is lined, and folding several inches of lining creates a ridge inside the arm that you can feel all day. On a soft jersey or knit blazer that reads as a ruched cuff, which looks deliberate. On a structured wool jacket with a firm canvas, it reads as a mistake. The fold also works its way loose within a wear or two.
If you need something that reads as a deliberate detail rather than a fix, a slim scrunchie or a button elastic worn inside the sleeve gathers the excess into a soft ruched cuff. It is a good look on a jersey or knit blazer, where a hard fold would never sit flat anyway. Just do not put a thick elastic over a fine wool sleeve, and do not stretch it tight, because the tension slowly stretches the lining.
This method is worth using when you need the blazer to fit for one event, when you are between sizes, or when you have not decided whether to alter it properly. It is not worth using on a garment you plan to keep for years, and it is not worth using on a formal or evening jacket, where the sharp edge of a folded cuff gives the whole thing away.
How to Shorten Sleeves on a Blazer by Sewing
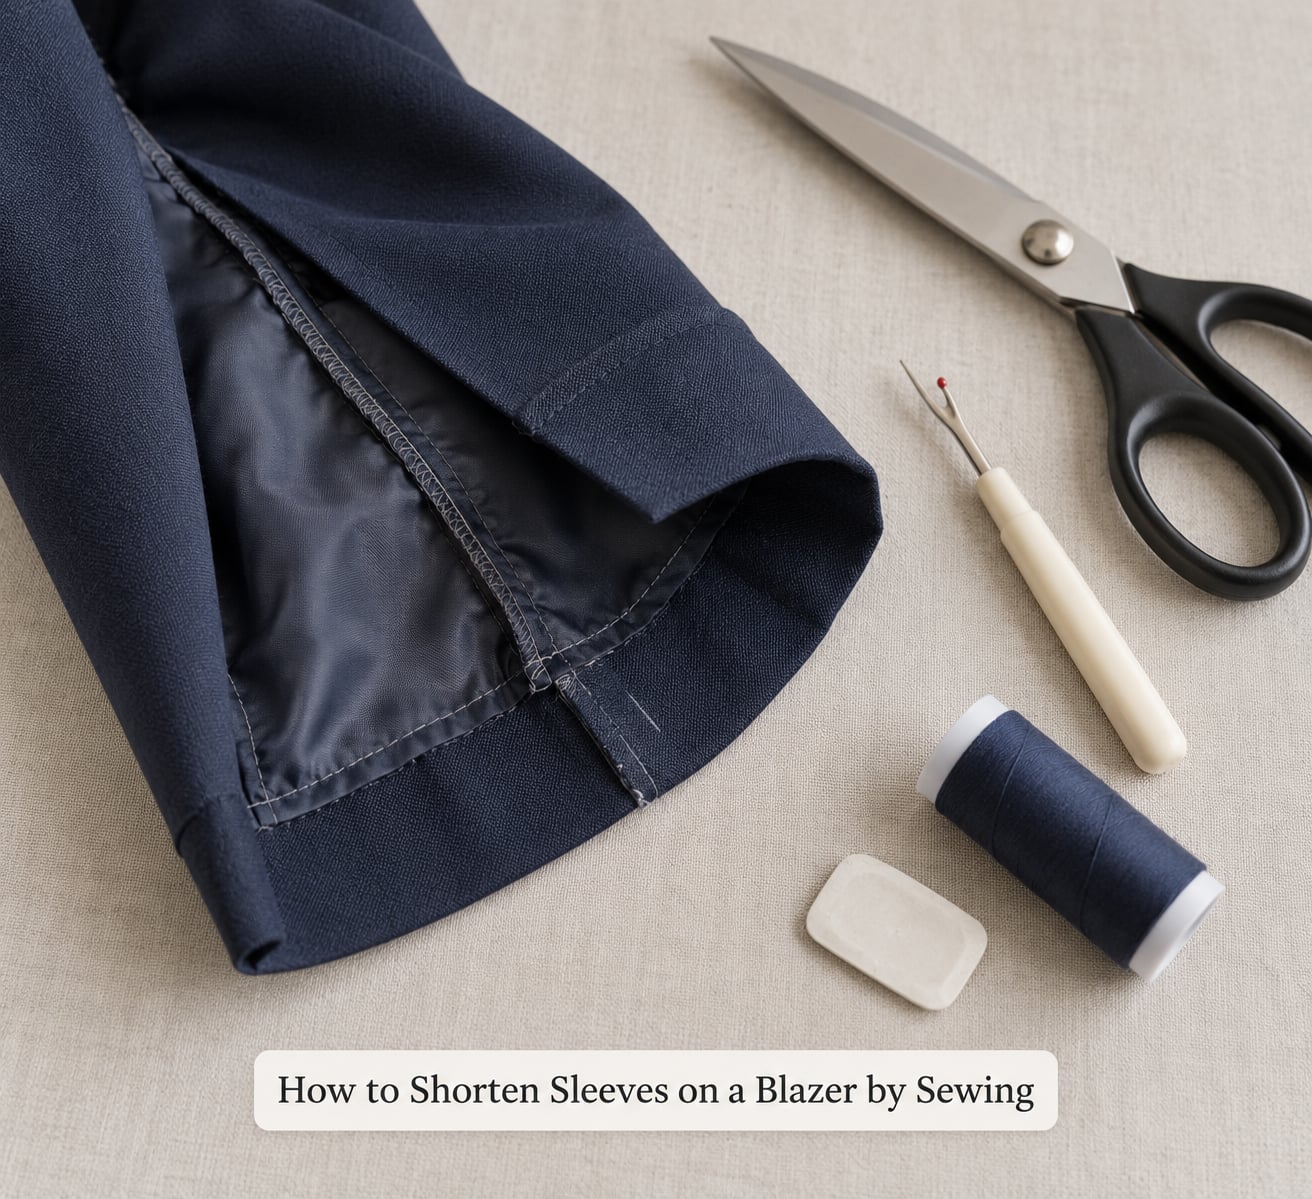
This is the permanent method, and it works on any blazer whose sleeve is a plain tube with no functioning buttonhole. Read the whole sequence before you start, because the order matters.
Step 1: Pin the length on your body. Button the blazer, bend the arm the way you normally carry it, and pin the sleeve at the length you want. Most people land on a quarter inch above the wrist bone, with a sliver of shirt cuff showing. Some petite wearers prefer a full inch. Try it both ways.
Step 2: Count what you are removing. Measure from the original cuff edge to your pin, and write the number down before the pin comes out. On a standard sleeve seam allowance of about half an inch, you can remove a little under an inch without losing the hem entirely. If you are taking off three inches or more, you will need to create new hem allowance and the original hem will not survive. That is normal, and it is why a tailor charges more for a large reduction.
Step 3: Take off the cuff buttons. Work the seam ripper under the thread and cut, rather than pulling, so you do not stretch the fabric. Group the buttons and keep the loose thread tails with them, because that is the easiest way to reattach them in the original place.
Step 4: Open the lining. Turn the sleeve inside out. You are looking for the seam where the lining sleeve is joined to itself or to the shell near the cuff. Open only the length you need plus about half an inch, and stop. Cut too much and the lining is no longer attached at the cuff and the sleeve slides.
Step 5: Mark and cut. With the sleeve flat and smooth, mark the new hem with tailor’s chalk, placing it above your pin by the fold allowance you need. Cut the shell fabric first along the chalk line, then the lining, keeping the layers together so they stay the same length.
Step 6: Fold, press, stitch. Fold the raw edge to the inside, press it with a cloth between the iron and the fabric, and stitch it flat on the machine or with a blind stitch by hand. A hand-sewn hem is slower and nearly invisible; a machine topstitch is faster and shows a line of thread on the inside.
Step 7: Close the lining and reattach the buttons. Fold the lining hem under by a quarter inch, press lightly, and hand-sew it closed with a catch stitch so nothing shows when you move your arm. Then stitch the buttons back where you found them.
A note on men’s versus women’s construction. Men’s suit jackets and most women’s blazers are sewn the same way at the sleeve, so the method is identical. The difference is the vent. Men’s jackets almost always have one or two functional vents with a button above them, and women’s blazers are more often ventless or have a decorative slit, which is far easier to work around.
An unlined blazer skips steps 4 and 7 entirely. There is no lining to open and none to close, so the job becomes measuring, cutting, folding and hemming. That is why an unlined jacket is a good first project: a hand-sewing needle, matching thread and a little patience cover the whole thing, and it takes less time than most people expect.
Fabric notes worth two minutes of your time
The same steps behave differently depending on what the blazer is made of, and this is where beginners get caught out.
- Wool and wool blends press well and press flat, which makes them the easiest to hem. Press with a cloth and heavy steam, and let the sleeve cool before you stitch so the crease holds.
- Linen frays at the cut edge, so fold the hem over twice or finish the raw edge with a tiny stitch. A crisp new hem is normal and will soften with wear.
- Poly and cotton blends, common on ready-to-wear jackets, are the ones to check the care label on. They can shrink in a hot wash, which will quietly shorten the length you just set.
- Denim has a visible topstitch line you must not unpick, and the seam allowance is often already fully used. Take off a small amount only, and use a seam ripper on the stitch line rather than cutting through it.
- Velvet and corduroy should never be pressed directly. Use steam and a pressing ham, and expect the pile to need brushing back afterwards.
- Knit and sweater sleeves are a different technique entirely. There is no seam allowance to fold, and a straight hem will pucker. If your blazer is a knit with a ribbed cuff, shorten from the shoulder seam instead and let the rib trim do the work.
How to Finish a Sleeve After Shortening
The difference between a home alteration and a professional one is usually in the finish rather than the length. Here is where you can close the gap.
Preserve the original hem. If the excess is small enough, mark the new hem above the existing stitch line, cut away only what is beyond it, and then fold the old hem back into the sleeve. The new seam sits on top of the old one, invisible from the outside, and you get a second hem you can let down later. A stitch line showing across the sleeve is the giveaway that the hem was redone.
Match the seam allowance. A factory hem is usually a narrow turn with a stitch line about a quarter inch in. Reproduce that width and the new line will sit exactly where the old one would have.
Press with a cloth, and press the sleeve last. Press the sleeve flat before the sleeve is set back into the armhole, or steam it on a dummy form. Pressing a fully assembled sleeve with a heavy iron risks flattening the curve where the sleeve meets the shoulder, and you will not be able to get that back.
Check the fit from several angles. Hold your arm straight out, bend it, cross it in front of you and put the blazer on again. Watch for two things: a sleeve that twists toward the front of the arm when the elbow bends, and two sleeves of visibly different length. A twisted sleeve almost always means the fold was not even, so the raw edge is not a straight line all the way around.
Choosing a Professional Alteration
Some blazers should go to a tailor, and there is no version of this article that changes that. Send it out if any of these apply.
- Working buttonholes. When the button goes through the hole and the cuff is sewn over the lining underneath, the cuff cannot be cut off without destroying the buttonhole. Rebuilding it is skilled work.
- Bound or stitched buttonholes. Tailors will tell you these are more involved than plain ones, and the alteration may not be worth the cost.
- Structured or expensive jackets. A lined jacket with a firm canvas front, a designer piece or anything sentimental deserves a professional invisible finish.
- Velvet, corduroy and heavy melton. These crush or shine under an iron, and the correct tool is a pressing ham and steam, not a domestic iron.
- Vents that need re-taping after the new length moves them.
- More than about two inches off. A large reduction means new hem allowance, and the original hem is gone.
It helps to know that professional tailors consider this one of their favourite jobs. It is routine, quick, and the most common request they get for a garment that otherwise fits perfectly. Fees vary by region and by service, and a plain sleeve shortening is usually the cheapest alteration on the menu, so ask for a quote before you book rather than assuming.
At the appointment, say three things: that the body fits and only the sleeves need work, the exact finished length you want, and whether you want the original hem preserved. Wear the shirt you plan to wear with the blazer. If the blazer is vintage or gifted, mention that too, because it changes how cautiously a tailor will work.
One last case is worth knowing about, because it is a common disappointment. If the sleeves are too tight rather than too long, letting them out is limited by how much seam allowance is left in the armhole, and most ready-to-wear blazers have almost none. A tailor may be able to gain an inch or so, but a genuinely tight sleeve often means a new blazer. That is the reverse of the situation most people bring in, and it is far harder to fix.
Common Mistakes
Most first attempts go wrong in one of five places, and all five are avoidable.
- Measuring from the shoulder. Shoulders vary hugely between blazers, so a number taken from the shoulder seam tells you nothing. Measure the finished length against your own wrist bone.
- Cutting the lining to the same depth as the shell and losing the lining entirely at the cuff.
- Taking off too much. Pin on the body, check twice, then write the number down.
- Ignoring cuff buttons and stitching straight through them.
- Skipping the final press, which leaves the hem and the fold visibly lumpy from the outside.
Common Mistakes to Avoid
Here is the same ground laid out as a problem-and-fix table, because the pairing is more useful than the list.
| What goes wrong | Why it happened | The correction |
|---|---|---|
| Hem line visible across the sleeve | The old hem was cut off and a new fold is wider than the factory allowance | Match the original stitch line width exactly, usually about a quarter inch |
| The sleeve twists when the elbow bends | The fold is deeper on one side than the other, so the raw edge is not a straight line | Unpick the hem, lay the sleeve flat, and re-fold edge to edge |
| Lining shows at the cuff | The lining was cut shorter than the shell, or its hem is not secured | Cut lining to the same depth, fold under a quarter inch, and catch stitch it closed |
| Sleeve is now slightly too short | Measured with the arm hanging instead of bent into a natural position | Let the hem out a quarter inch; the original stitch line marks exactly where it goes |
| Length disappears after cleaning | Care label not read before altering, and the fabric shrank | Check the label first, hand-wash cool, and skip the tumble dryer |
| Fabric shiny or crushed at the fold | Pressed directly without a cloth, or on velvet and corduroy | Use a pressing cloth, steam rather than iron, and set a cushion inside the sleeve |
| Sleeve is loose and baggy | The excess was gathered to one side instead of being folded flat around the arm | Unpick the fold, lay the sleeve flat, and redo it with the excess spread evenly |
Two quick habits prevent most of the above. Take a photo of the sleeve pinned on your body before you unpin it, so you have a reference for both the length and the angle. Then work on one sleeve completely before touching the other, because a half-finished pair is where mistakes become permanent.
One more check worth doing before you cut anything. Sleeves that are too tight are a different problem, and much harder. Letting a sleeve out is limited by how much seam allowance is left in the armhole, and most ready-to-wear blazers have almost none. Too long is the fixable one.
Frequently Asked Questions
Can I shorten blazer sleeves without sewing?
Yes, temporarily. Fold the excess sleeve fabric to the inside, leaving it a quarter inch above the wrist bone, and secure the fold with pins, a safety pin, or a small button elastic. Nothing is cut, so it is fully reversible and takes about five minutes. The catch is bulk: folding several inches of lining creates a ridge you can feel inside the arm, and the fold loosens with wear. It suits a soft knit blazer or one event. It does not suit a structured wool jacket or an evening blazer.
How much should I take off a blazer sleeve?
Pin the sleeve while you are wearing the blazer, then measure from the pin to the existing cuff edge and write the number down. Most alterations run from half an inch to two inches. Removing less than about an inch usually lets you preserve the original hem, which gives a completely invisible finish. Taking off three inches or more means creating new hem allowance, and the original stitch line is gone. A quarter inch above the wrist bone, with a sliver of shirt cuff showing, is the target most people land on.
Should I shorten a blazer sleeve at the cuff or from the shoulder?
At the cuff, unless the sleeve has working buttonholes. A cuff shortening is a straight re-hem, and it is the only method that leaves the sleeve cap, armhole and shoulder completely untouched. Shortening from the shoulder seam opens the whole sleeve and risks a puffy cap, so it is reserved for working-buttonhole sleeves that cannot be re-hemmed. It is a genuinely advanced alteration, and a tailor is usually the sensible choice for it.
Can a tailor shorten sleeves with cuff buttons?
Yes. Decorative cuff buttons, which are the majority on a blazer, come off with a seam ripper and go back on at the new cuff position, so there is no extra cost and no problem. Working buttonholes are different: the cuff is sewn over the lining and the button passes through a real hole, so shortening destroys the buttonhole. A tailor can either rebuild the buttonhole in the new position or shorten the sleeve from the shoulder seam instead. Bound or stitched buttonholes take longer and cost more.
How do I keep the lining from showing when shortening a sleeve?
The lining and the shell must end at the same depth, and the lining needs its own hem. Cut both layers together along one chalk line, fold the shell hem under, press it, and stitch it. Then fold the lining edge under by about a quarter inch and hand-sew it closed with a catch stitch, which closes the seam without leaving thread on the outside. A lining hem secured with a running stitch instead will loosen and show the moment the sleeve flexes.
What is the best sleeve length for a blazer?
A quarter inch above the wrist bone, with a small amount of shirt cuff showing when you wear it. That is the rule most tailoring references use and the one that keeps a jacket looking relaxed rather than cropped. Some petite wearers prefer a full inch so the sleeve clears the wrist bone entirely when the arm is bent. Try both with your usual shirt on, bend your arm as you would in real life, and pick the length that does not shift when you move.
Conclusion
Start by pinning the sleeve on your body where you want it to end, usually a quarter inch above the wrist bone, and write down how much you are taking off. Then look inside the cuff. No lining and no working buttonholes means you can shorten it by hand this afternoon. Working buttonholes, a vent you would rather not lose, or a jacket you cannot replace means a tailor, and that is a small price for keeping the garment.