Quality stitching is easy to judge once you know four things to look for: even spacing, tight stitch density, no skipped or broken threads, and clean finished edges that will not fray. Most shoppers never turn a garment over, so a badly assembled piece sails through the fitting room and fails at the first wash. Learning how to spot quality stitching on clothes takes about a minute per garment once you know where to look, and the same routine works in a fitting room, at a thrift store, or when a delivery arrives.
The awkward part is that the outside of a garment flatters it. A visible topstitch line can be decorative on a workwear jacket and structural on a shirt collar, and a raw edge can be deliberate on an unlined skirt or lazy on a lined blazer. So the checks below look at construction as a system rather than hunting for a single tell.
Here is how to spot quality stitching on clothes: turn the garment inside out, work from the biggest stress points to the smallest seams, judge consistency instead of a universal stitch count, and separate what is structurally sound from what is merely unfinished-looking.
Table of Contents
- What You Need
- Step-by-Step: How to Spot Quality Stitching on Clothes
- 1. Turn the Garment Inside Out First
- 2. Check Stitch Density and Spacing
- 3. Follow Each Seam Line for Straightness
- 4. Test the Stitch Tension
- 5. Inspect Hems, Seams, and Stress Points Closely
- 6. Confirm the Hem Is Even and Functional
- 7. Look for Backstitching and Reinforcement
- 8. Examine Raw Edges and Seam Finishes
- 9. Compare Both Sides and Check Overall Alignment
- Common Mistakes When Judging Stitching
- Frequently Asked Questions
- Does uneven stitching always mean a garment is low quality?
- Can I tell if clothing is well made if it is inexpensive?
- Why does the stitching on my new clothes pucker after washing?
- How can I inspect stitching on a vintage or handmade garment?
- What should I check before buying a garment with a machine-finished hem?
- Conclusion
What You Need
None of this is expensive, and none of it is strictly required. But each item makes a specific flaw easier to see, and most flaws are invisible under store lighting until you get the garment into daylight.
- Your phone camera. Take a close photo of the seam and zoom in. Puckering, thread bunching at a seam end, and skipped stitches read much more clearly on a screen than through a fitting room mirror.
- Bright natural light. A window is better than overhead store lighting, which flattens texture and hides waviness in a seam line.
- Your hands and a flat surface. Lay the garment on a counter or hold the seam against a flat palm. Curved fabric hides straightness problems.
- A small ruler or seam gauge. Useful for counting stitches per inch and checking hem and seam allowance width. A credit card works as a rough gauge in a pinch.
- Access to both sides of the garment. This is the real requirement. If a shop has sewn the labels on and cannot let you turn it over, that tells you something too.
Step-by-Step: How to Spot Quality Stitching on Clothes
The order matters. Broad construction details first, close stitch checks second, and finish by comparing both sides of the garment so a single odd-looking seam does not decide your verdict.
1. Turn the Garment Inside Out First
The inside of a garment is where the workmanship actually lives. Outside seams are pulled flat by pressing and by the cut of the pattern, which hides more than it reveals.
Flipped inside out you can see the seam allowances, the thread ends left at the end of each line, whether the machine stitching is even, and how the raw edges were finished. A pass-or-fail test: the inside should look deliberate. Loose thread tails left untrimmed, tangled thread in the seam channel, allowances cut at wildly different widths, or a seam that has been re-sewn over suggest rushed assembly.
One small loose tail at a side seam is normal on almost anything, including good coats. Multiple tails, or tails pulled hard enough to pucker the fabric around them, are not.
2. Check Stitch Density and Spacing
Consistency matters more than any number. Lay the seam flat and count the stitches across about two inches, then do the same three or four inches further along the same seam, and on a different seam. If the count changes noticeably along one line, the machine was running inconsistently.
Stitch density is usually measured in stitches per inch, abbreviated SPI. Mass-market garments commonly run around 8 to 10 SPI on visible topstitching, mid-range sits near 10 to 12, and premium shirting often runs 12 to 14 or denser. On shirt side seams the traditional benchmark quoted by shirtmakers is 7 to 9 stitches per centimeter, which is roughly 18 to 23 SPI because those seams are sewn at a finer setting.
| Garment and seam | Typical stitch density | What uneven spacing looks like |
|---|---|---|
| Fast-fashion woven top, visible topstitching | About 8 to 10 SPI | Gaps that visibly change length, sometimes a skipped stitch mid-line |
| Mid-range shirt or dress, topstitching | About 10 to 12 SPI | Minor variation, one or two longer stitches per panel |
| Premium shirting, side seams and topstitching | About 12 to 14 SPI | Near-uniform spacing from end to end |
| Fine dress shirt, side and sleeve seams | About 7 to 9 stitches per cm | Even, fine, dense line with no thread breaks |
| Denim and workwear, main seams | Fewer stitches, longer stitch, often double-needle | Even spacing; multiple parallel lines on stress seams |
| Knitwear, stretch seams | Wider, deliberate spacing | Uneven spacing here is a fault; wide spacing is not |
Two caveats. Very dense stitching on a light or delicate fabric can perforate the cloth and cause pucker after washing, so more is not automatically better. And on knits, wide and even spacing is correct because the seam has to stretch with the garment, so judge consistency rather than count.
3. Follow Each Seam Line for Straightness
Start at one end of the seam and trace it with your eye all the way to the other end. You are watching for a line that runs in one direction the whole way.
Curves and shaping create some legitimate variation. An armhole, a waistband curve, or a princess seam follows a pattern, so its line should curve smoothly and evenly, never kink or change direction abruptly.
The warning signs are a seam that wanders side to side as it travels, an allowance that is wide at one end and narrow at the other, and a seam that ripples in a fixed wave even when the garment hangs flat. On a striped or checked garment, misalignment across the seam is the fastest way to spot a rushed match, though a slight offset at an off-center seam is normal in plaid.
4. Test the Stitch Tension
Tension problems show up as thread on the wrong side of the fabric. With a normal lockstitch, the top and bottom threads meet inside the seam allowance and you should see no thread loops from either face.
Here is what each failure looks like. Loose top threads or bobbin loops poking through the fabric mean the tension is too loose. A wavy, rippled, or pucker-prone seam where the fabric is drawn in means tension is too tight. Thread bunched or tangled at the end of a seam line points to a fast, careless stop rather than a tension fault.
Run a gentle functional test: take the seam between thumb and forefinger on both sides of the join and pull slowly and evenly, without distorting the fabric. Then check the front and the inside for new looseness, fresh loops, or a ridge of puckering that was not there before. If the seam stretches, gaps open, or threads pull free, the seam is not holding and it will get worse. Gentle means gentle. Yanking a seam hard to make it fail proves nothing except that you can break thread.
5. Inspect Hems, Seams, and Stress Points Closely
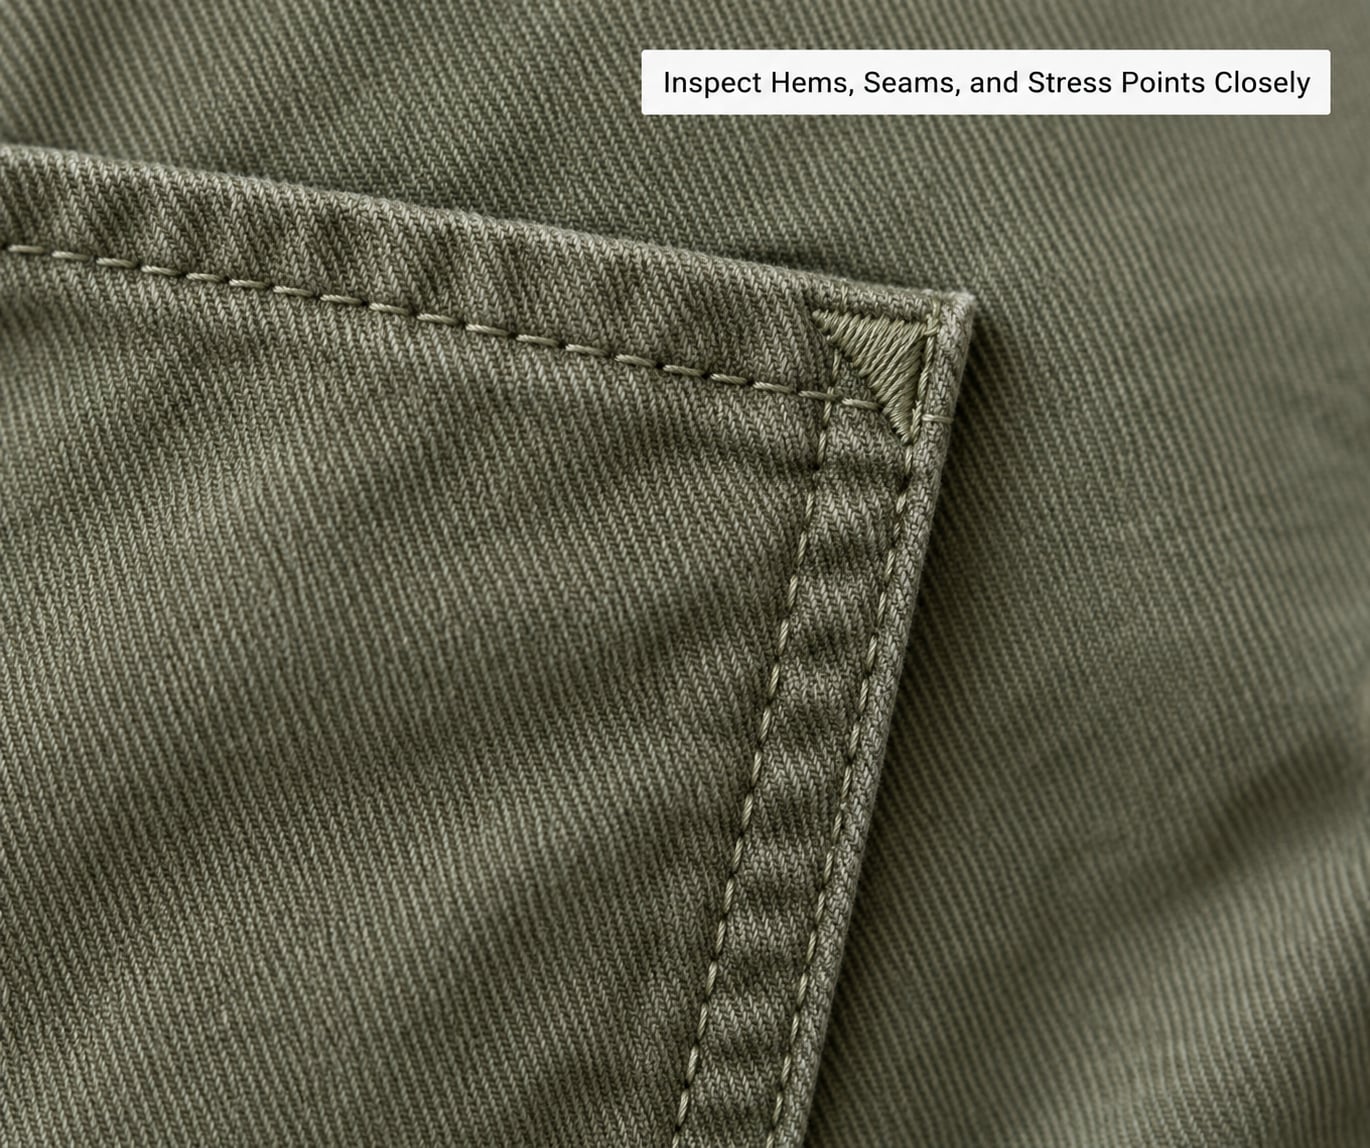
Stress points are the joins that get pulled hardest every time the garment is worn: the armhole, the shoulder seam, the crotch, the waistband, the back of the neck, pocket corners, buttonholes, and where a sleeve meets the body. These are the places to inspect first, because this is where quality separates.
A load-bearing join should show stitching that is unbroken along its whole length, no skipped sections where the layers meet, and enough seam allowance that the garment could be let out or altered later. Standard seam allowance on a woven garment is roughly half an inch, or about 1.5 cm, with generous allowances at stress points like the waistband and armhole. A garment assembled with allowance so narrow that the stitching sits right on the cut edge has no margin at all.
Also check that the reinforcement matches the load. A tiny neat row of dense stitches across the end of a seam is a bar tack, and that is exactly what you want to see. Nothing at all at the point of highest pull is a genuine omission, no matter how tidy the rest of the seam looks.
6. Confirm the Hem Is Even and Functional
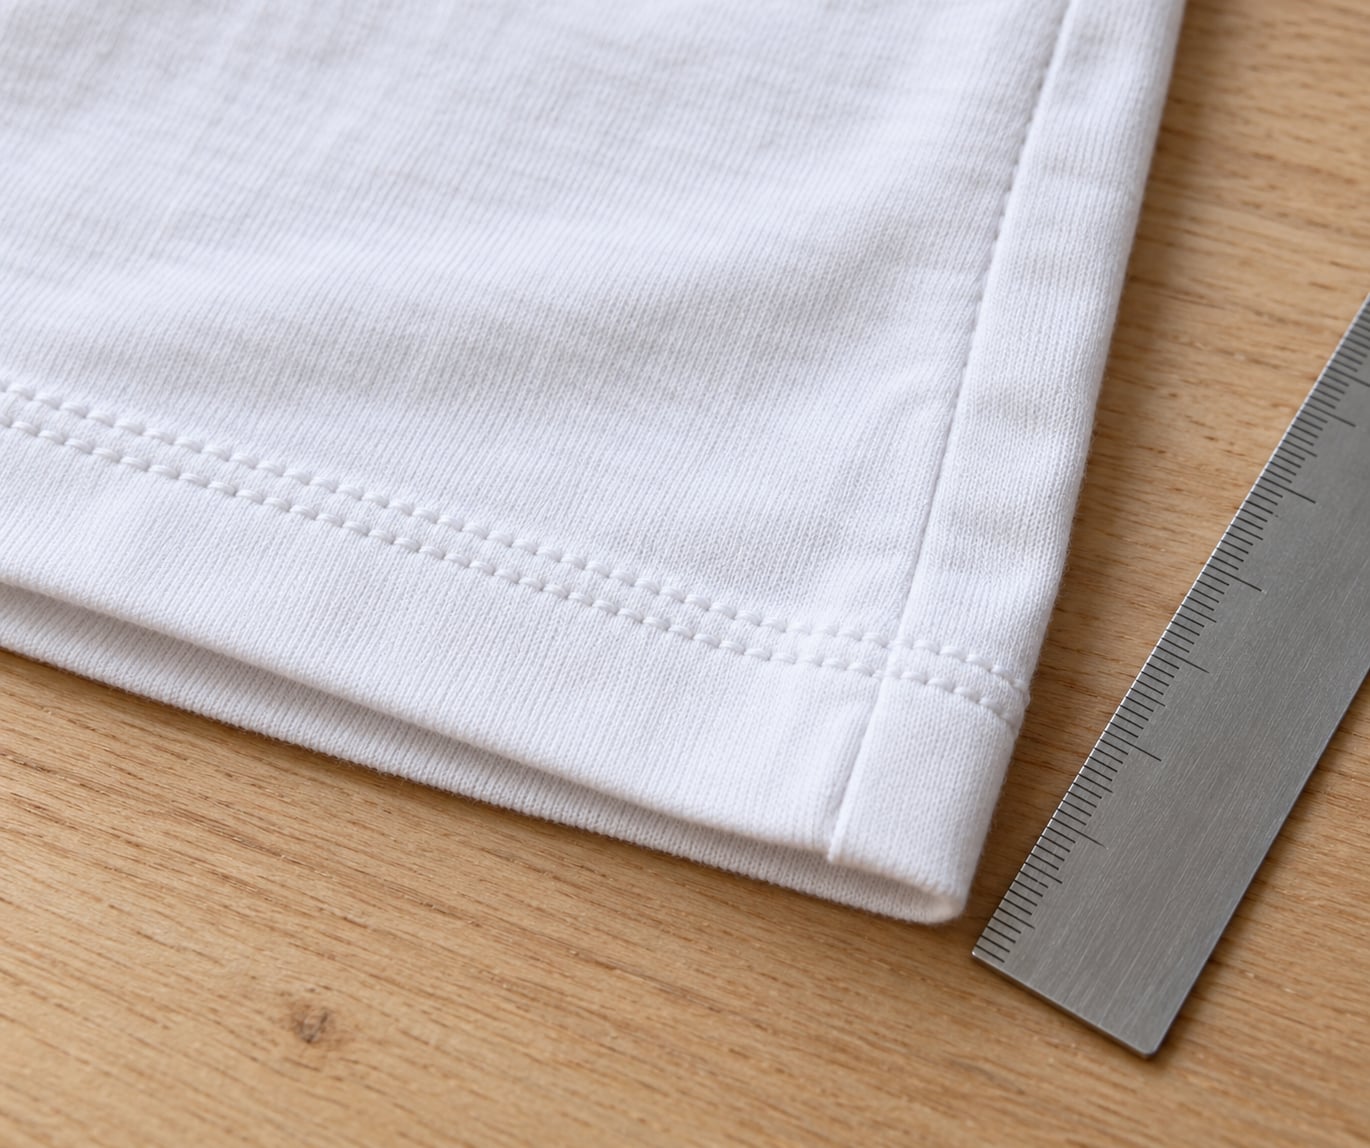
An even hem is about proportion and alignment, not just secure stitching. The fold should run parallel to the bottom edge, the stitching line should be consistent along its length, and the finished edge should be trimmed straight.
Suspend the garment on a hanger and look at the bottom line from a distance. If one side dips lower than the other, the hem is uneven. An uneven hem changes the whole silhouette even when the seam itself is technically strong, which is why tailors charge for a hem but anyone can ruin one.
Keep an eye out for a deep hem allowance with the original factory crease still in it. That is a well-made, expensive hem. A shallow, narrow, machine-folded hem is normal on mid-range and budget garments and works fine. Neither tells you the garment is good or bad; what tells you is whether the fold is even, the spacing is consistent, and the edge is finished.
7. Look for Backstitching and Reinforcement
Backstitching is simply sewing forward a short distance, reversing, then sewing forward again over the same stitches. It locks the seam end so it cannot unravel when the thread is trimmed. In plain terms: it is the bit that stops a seam from quietly opening after a few washes.
Expect to find it at both ends of a seam, at pocket openings, at the top of a buttonhole, at the end of a waistband placket, and around the base of a zipper. On structural seams that is usually enough. Where a load is repeated, a clean seam can show a small triangle of stitches fanning out from the centre where the layers meet. That is a three-point stitch, sometimes called a chicken foot because of the shape, and it is a strong sign the seam was reinforced on purpose.
Ordinary tiny reinforcing stitches at a seam end are normal on anything. Missing reinforcement at a load-bearing join is a warning sign, especially combined with a narrow allowance.
8. Examine Raw Edges and Seam Finishes
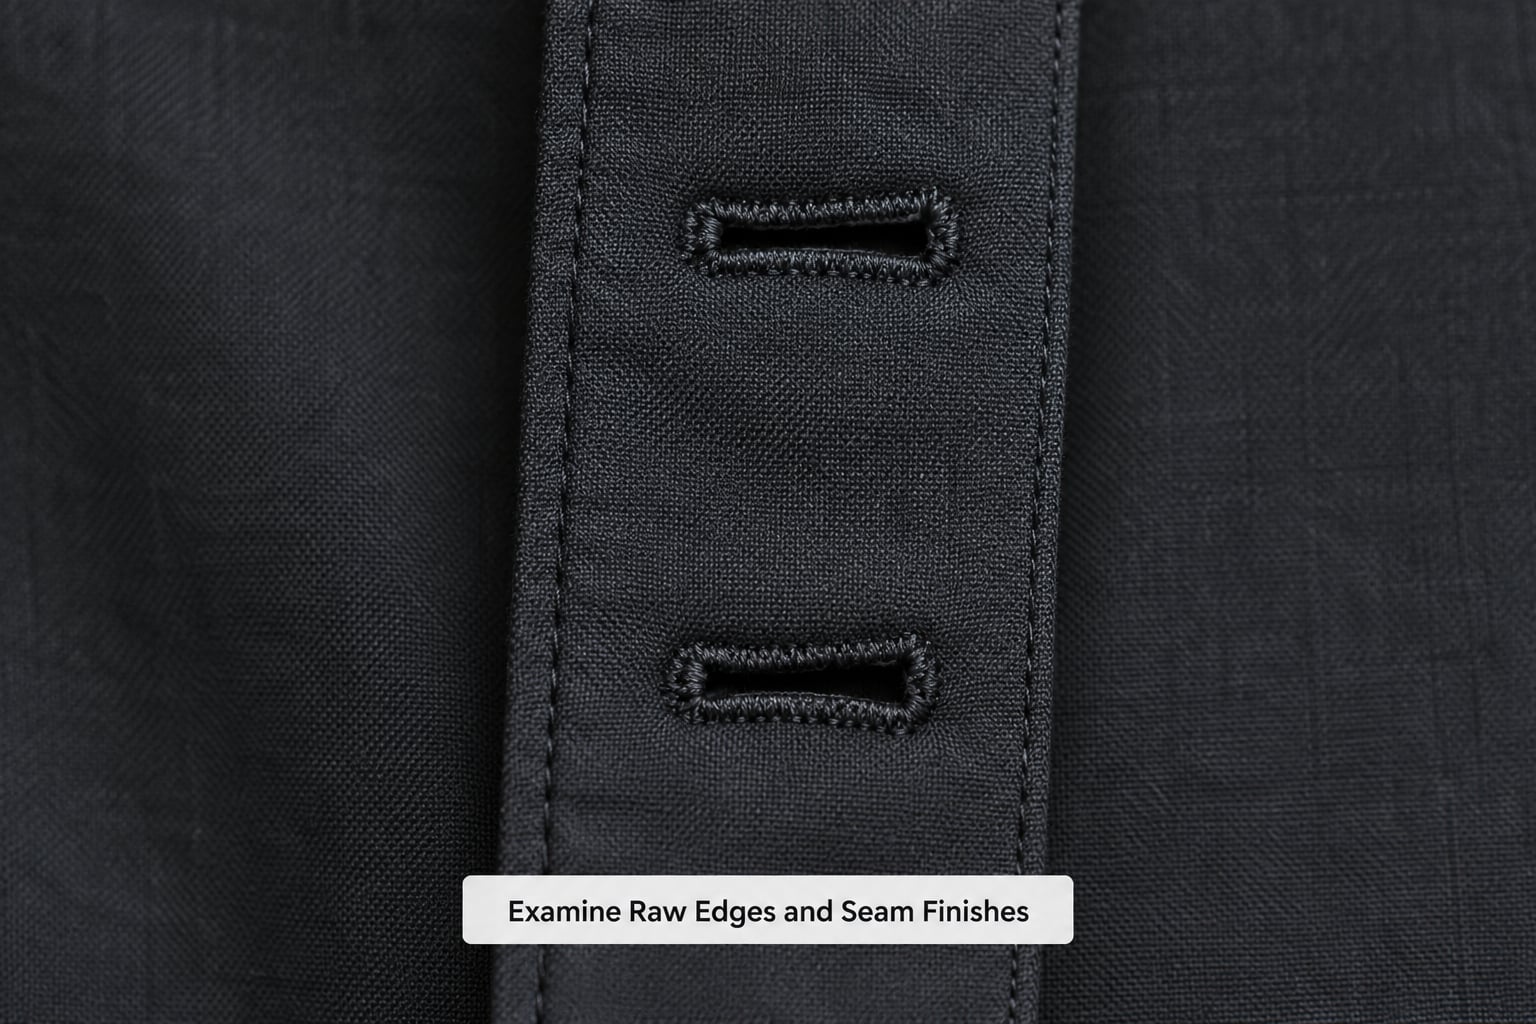
Seam finish is how the raw cut edge of the fabric was treated after sewing. This is where most cheap garments give themselves away, and it is also where a garment can be perfectly well made with a simple finish.
| Seam finish | How it works | Strength and what to look for |
|---|---|---|
| French seam | Raw edges enclosed inside the seam | Strongest and cleanest; no exposed fabric at all. Common on premium shirting |
| Flat-felled seam | Both allowances folded and enclosed | Very strong and bulk-free; you will see two parallel stitch lines. Used on denim and jeans |
| Overlock or serged seam | Multiple threads loop around the edge and trim it | Clean, slightly stretchy, and perfectly normal on knits and most mid-range garments |
| Bound seam | Raw edge wrapped in bias tape | Neat and durable; common on blazers, coats, and unlined jackets |
| Overcast or whipstitch | Hand or machine loops over the edge | Adequate for woven shirting; looser and hand-repairable |
| Zigzag stitch | Zigzag line across the cut edge | Acceptable on stable fabric, weak on woven edges under stress, and easy to fray |
| Pinked or raw edge | Cut with pinking shears, or not treated at all | Weakest. Pinking just slows fraying. Raw edges are fine on unlined or inside-out garments |
Exposed raw edges are not automatically a defect. An unlined summer dress or a raw denim hem is meant to look that way. What matters is whether the finish is consistent, whether the trimming is straight, and whether the seam is already fraying at the shop.
Other edges deserve a look too. Check the interior facing at a neckline or front opening: if the facing fabric is a different weight or colour from the shell, the garment was built in pieces, and that mismatch is normal. What looks wrong is a facing cut shorter than the opening, which exposes the seam allowance from the front.
9. Compare Both Sides and Check Overall Alignment
Finish by holding the garment up and looking at it as a whole, rather than through a loupe at one seam. Symmetry tells you whether the pieces were cut and assembled accurately.
Check that left and right side seams mirror each other, that the hem sits level, that pockets are the same distance from the waistband on each side, that buttons are evenly spaced and at matching heights, that buttonholes sit parallel and evenly placed, and that zippers run straight with no ripple in the fabric beside them.
On striped, checked, or patterned garments, compare the pattern across every seam you can reach, including the pocket bags and the collar stand. A quality garment matches the pattern deliberately at the front, pockets, and yoke. Small mismatches on an off-center or curved seam are normal and no one will ever see them.
Two final checks before you decide. Pull the garment on and move in it, because fit issues at the shoulder, armhole, and waistband often come from assembly rather than sizing. And check the care label while you have the garment open, since a label that cannot be reached without cutting means the inside was never designed to be inspected.
Common Mistakes When Judging Stitching
Most bad verdicts come from a few repeat mistakes. Here they are, with the fix.
Judging by thread count or thread colour alone. A heavier thread does not make a seam stronger, and a bright topstitch is often purely decorative. Look at consistency of spacing and at the finish instead.
Confusing topstitching with structural stitching. Topstitch is the visible line on the outside of the garment. It can be there for looks, and structural load may be carried by something you cannot see. Judge what a stitch line is doing before you judge how it looks.
Only examining the outside. This is the biggest error, and it is the reason learning how to spot quality stitching on clothes requires turning the garment over. Pressing and pattern shaping hide waviness, narrow allowance, and skipped stitches from the face.
Pulling too hard. A hard tug breaks thread on any garment, including an expensive one, and tells you nothing. Pull gently and evenly, then inspect the front and inside for what changed.
Treating garment-specific construction as universal. Visible topstitching on outerwear, raw hems on unlined pieces, and a hand-finished seam on a coat are design choices, not defects. A french seam on a dress shirt and a wide chain stitch on a swimsuit serve different jobs, and neither is wrong.
Relying on one visible sign. Combine at least four checks: spacing, tension, edge finish, and reinforcement at stress points. A single loose thread tells you almost nothing, which is why a popped stitch is treated as a repair rather than a verdict. One thread catching on a fingertip is usually a cutting artifact left at the edge of the fabric roll, and it trims away in seconds.
A note for second-hand and thrift shoppers, where loose threads and small popped seams are common: catching those early with a quick whipstitch beats binning the piece. The same advice applies to workwear. One popped thread on a technical jacket does not mean the seam will fail, because most seams do not fail from a single thread, but a run of skipped stitches along the same line does.
Finally, distrust the label over the seam. Even well-known technical brands ship with disappointing stitch quality sometimes, which is a fair reason to judge the garment in your hands rather than the name on the neck. Marketing language such as premium or luxury tells you nothing you can measure.
When you are buying online you cannot turn anything over, so work with what you have. Look for construction photography, including inside shots and seam close-ups, and read reviews that mention stitching rather than fit. Check the return window before you buy, then inspect the seam the moment the box opens rather than after the tags come off.
Frequently Asked Questions
Does uneven stitching always mean a garment is low quality?
Not always. Knit and stretch fabrics are correctly sewn with wider, deliberate spacing, and hand-finished seams on outerwear are rarely machine-perfect. Uneven spacing becomes a real warning sign when it changes along a single woven seam, when it appears with skipped stitches, or when the seam ripples. Judge consistency along one line rather than comparing against an arbitrary stitch count.
Can I tell if clothing is well made if it is inexpensive?
Yes, and price tells you very little on its own. Budget garments are often single-needle with narrow allowances and simpler seam finishes, so they are easier to inspect but also have less margin for error. Check spacing, tension, finished edges, and reinforcement at stress points. A well-assembled budget piece will outlast a badly assembled expensive one every time.
Why does the stitching on my new clothes pucker after washing?
Two usual causes. Tension set slightly too tight during sewing can draw the fabric in along the seam, and the ripple only shows once the garment is washed. Or a hem and side seam were sewn at different lengths, so the fabric pulls unevenly. A pucker on a seam the machine stitched evenly is often a press or finish issue. Wet the seam and tug gently along it: if the ripple disappears while damp, it is tension.
How can I inspect stitching on a vintage or handmade garment?
Expect different standards. Hand-finished seams vary stitch to stitch by design, so look at technique rather than uniformity: tiny even running stitches, reinforced bar tacks at load-bearing points, and clean hand-picked seams. For a vintage piece, swap stitch-count norms for a condition check. Look for brittle or broken thread, fabric that has lost its give, faded or thinned areas along the fold, and pest damage near the hem.
What should I check before buying a garment with a machine-finished hem?
Four things. Is the fold even and the same width all the way round, or deeper at the sides. Is the stitching line consistent, with no wandering or bunching. Is the finished edge trimmed straight, with a corner at the side seam left properly closed. And does the garment hang level when suspended. A narrow fold is fine on a mid-range piece, but a hem with no allowance left can never be taken up later.
Conclusion
Knowing how to spot quality stitching on clothes comes down to a repeatable order of work: turn the garment inside out, start at the stress points, then check stitch spacing, tension, finished edges, and reinforcement. If the inside looks controlled and consistent, the garment will usually outlive the label on the care tag.
Quality is a pattern, not a single sign. Four or five consistent checks will tell you far more than any one thread, any price tag, or any brand name.