Breaking in new leather shoes takes two to four weeks of short indoor sessions plus a few real walks, not one heroic afternoon. You shape the toe box with acid-free paper or a boot tree, work a thin coat of conditioner into the stiff areas, then wear the shoes in 30-to-60-minute blocks with thick socks until the upper moulds to your foot and your gait.
The reason it takes that long is simple: leather arrives as a dense bundle of fibres sitting in a factory shape. Flexing it warms the fibres and they move, conditioner puts back the natural oils that let them move further, and after enough repetitions the shoe remembers your foot instead of the last it was built on.
Rushing that process is what gives people blisters, and blisters are the reason most people decide leather is not for them. Work through the steps below in order and you should get a pair that fits comfortably by the second or third week.
Table of Contents
- What You Need
- How to Break In New Leather Shoes Step by Step
- 1. Inspect the Shoes and Choose the Right Method
- 2. Fill and Shape the Toe Box
- 3. Condition the Leather so You Can Break In New Leather Shoes Gently
- 4. Test the Fit Indoors on Carpet
- 5. Follow a Gradual Wear Schedule
- 6. Recondition and Recheck as Needed
- Common Mistakes
- Frequently Asked Questions
- How long does it take to break in new leather shoes?
- Can I use baby oil or Vaseline to soften new leather shoes?
- What is the best way to stretch leather shoes at home?
- Should I condition suede or nubuck shoes before wearing them?
- Why do my new leather shoes rub even after several days?
- When is heel slippage a sizing problem rather than break-in?
- Conclusion
What You Need
None of this is expensive, and most of it lasts for years. The list below is organised by job, so you can skip anything you genuinely do not have.
- A leather conditioner or balm matched to the finish. Cream or paste for smooth full-grain and corrected-grain uppers. Suede and nubuck need a suede conditioner and a suede brush instead. Patent leather barely needs anything.
- Boot trees, shoe trees or boot shapers. Cedar or plastic trees hold the heel counter and toe box in shape while the leather is soft. Paper or newspaper only as a stand-in, and never if the ink is likely to transfer.
- Acid-free tissue paper or tightly rolled socks. For toe box shaping when you have no tree.
- Thick wool or cotton socks, or two pairs of normal socks. These add half a size’s worth of volume and take the friction off the first sessions.
- Moleskin pads, adhesive felt or blister balm. Applied before the hot spot starts, not after.
- A soft cloth and a soft-bristled brush. Horsehair brushes are the enthusiast favourite for dust on welted boots.
- A leather stretching spray and a two- or three-piece shoe stretcher. Optional, but the fastest route for a tight vamp or a narrow toe box.
- A hair dryer on its lowest setting. Useful in socks, held at a distance, for a stubborn spot. Never on high, never close.
- Protector spray. Add this after break-in, not before, so the conditioner has already soaked in.
If you have nothing but socks and a free afternoon, you can still get most of the way: shape with paper, wear indoors in short bursts, and add conditioner once you can buy it.
How to Break In New Leather Shoes Step by Step
The order matters more than the individual techniques. Prepping before you condition, conditioning before you wear, and testing before you go outside is what keeps the process painless.
1. Inspect the Shoes and Choose the Right Method
Not all leather responds the same way, so start by working out what you are holding. Look at the edges and the underside of the tongue: full-grain leather shows a fibrous flesh side, while split and faux leather show a woven or uniform backing.
- Smooth full-grain: stretches best, takes conditioner well, and is the easiest case.
- Corrected grain: coated and sanded on the surface, so it stretches noticeably less than full-grain. Expect a slower break-in.
- Patent or coated leather: a sealed film on top. Conditioning it can cloud or dull that film, so use a matching shoe cream sparingly and skip the stretching spray.
- Suede and nubuck: nap on the surface, so oils and heavy conditioners flatten it. They also barely stretch. Handle them gently and expect a longer job.
- Faux leather (PU or PVC): cannot be stretched at all. You are softening the finish with wear, not reshaping anything.
Before anything else, wipe the uppers with a dry cloth to lift off finishing residue and dust from storage. If the shoes feel slightly greasy from the factory, a barely damp cloth on the smooth areas is enough. Skip that step on patent and on suede.
How you choose affects everything that follows. A conditioner made for smooth leather on a pair of suede loafers is a mistake you cannot fully undo.
2. Fill and Shape the Toe Box
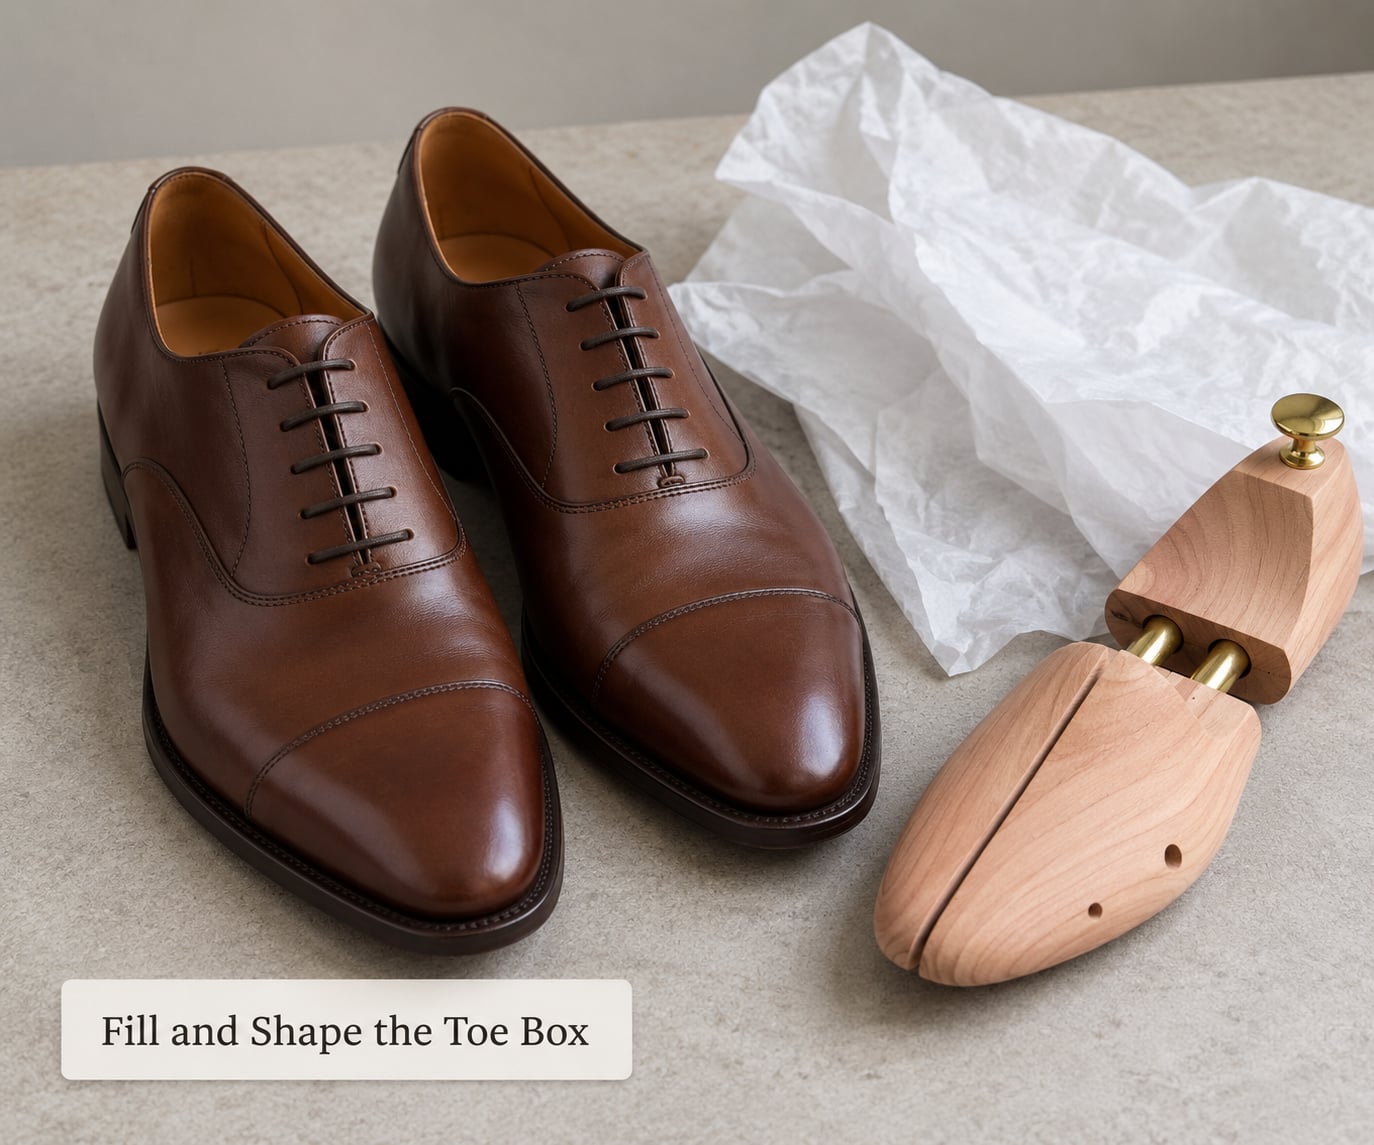
The toe box and the heel counter are the two areas that set the shape of the whole shoe, and both are made of stiff material at the factory stage. Shape them before you soften them and the leather has somewhere to go when it relaxes.
Pack the toe box with acid-free tissue paper or tightly rolled socks until the front of the shoe feels full but not forced. Fill the heel counter the same way so it stops collapsing inward. If you have a boot tree, put it in and leave it there for a day or two.
Overfilling is the common error here. Push too hard and you can distort the toe shape permanently, and you will find it every time you look down. You want the shoe to feel packed, not compressed.
You will know it worked when the shoe stands up on its own and holds its profile without the vamp buckling. That is what a supported toe box looks like.
3. Condition the Leather so You Can Break In New Leather Shoes Gently
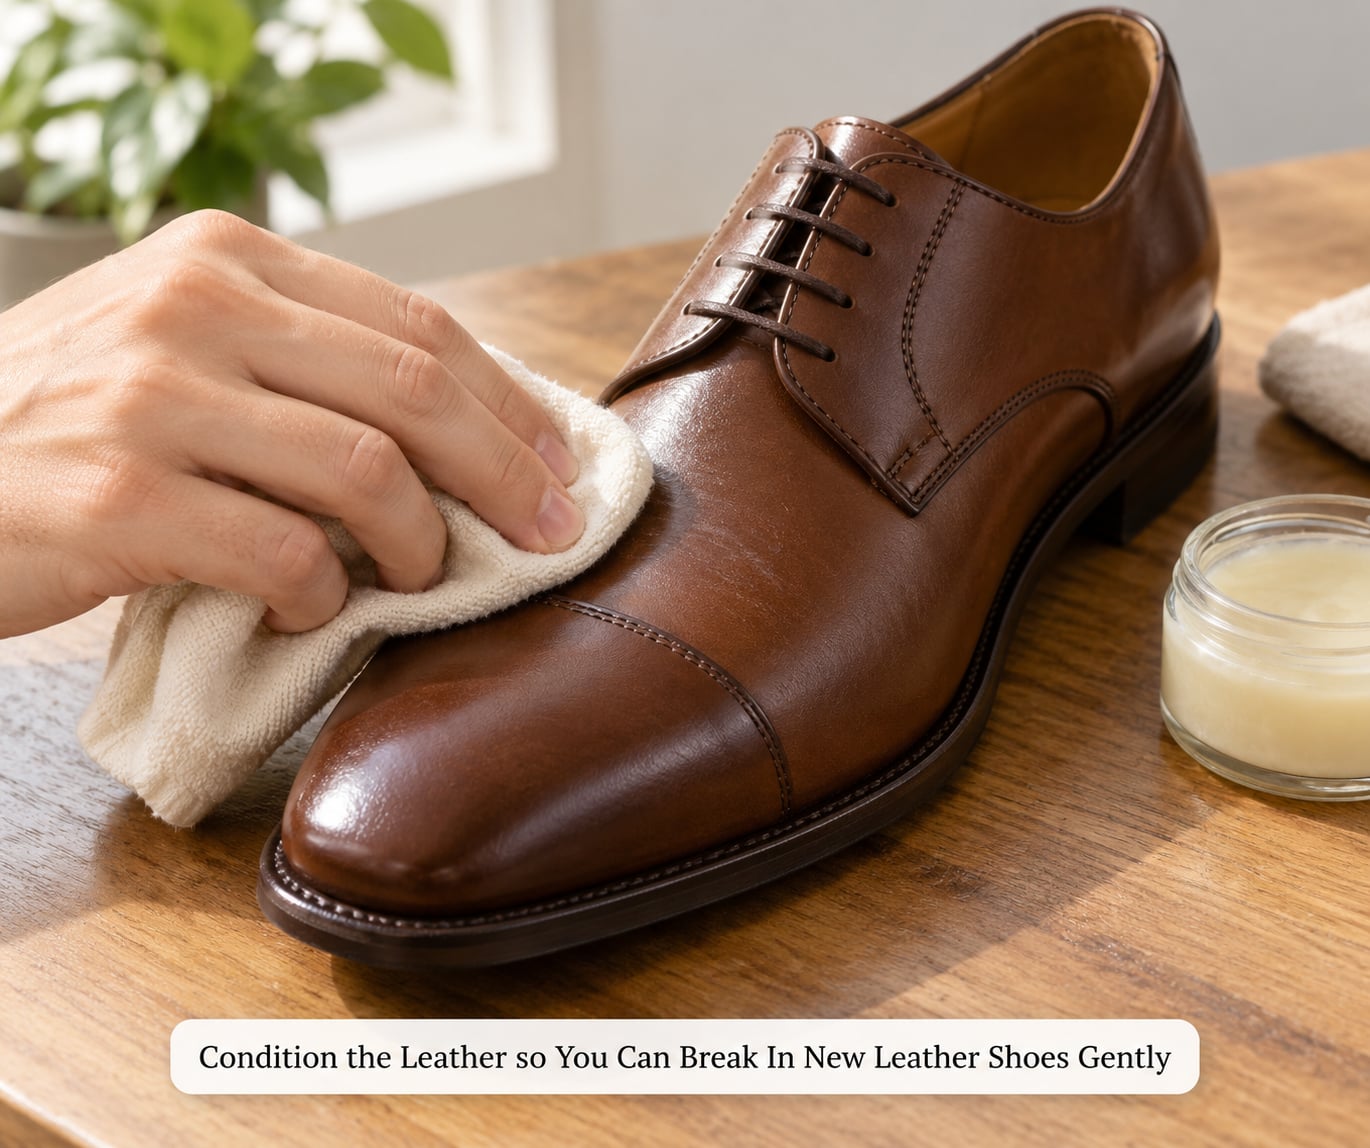
Conditioner is what makes the difference between a two-week break-in and a two-month one. Leather dries out on the shelf, and dried fibres are stiff fibres. A conditioner rehydrates the natural oils so the leather moves when it is flexed.
Apply a thin coat with a soft cloth, working it into the vamp, the quarters and the collar where the shoe flexes most. Then stop.
Give it time to soak in — 20 to 30 minutes for shoes, longer for boots with thicker leather. Wipe the excess off with a clean, dry cloth. If the leather looks greasy afterwards, you used too much, and you should wipe it back rather than add more.
Before you touch the visible side, test on the inside of the quarter panel. Wait a few hours and check for darkening or a tacky patch. On light-coloured leather, this test will tell you whether the conditioner is going to show.
Match the product to the finish. Smooth leather takes a cream or paste conditioner. Suede and nubuck take a suede conditioner and a suede brush, applied sparingly, and never mink oil or heavy paste, which crush the nap and leave the patch looking raw. Patent and faux leather take a light damp cloth and nothing else.
Two techniques from working cobblers and makers are worth knowing, and both come with caveats.
The first is a 50/50 mix of rubbing alcohol and water sprayed on the tight spot, then walked in until it dries. Alcohol temporarily swells the fibres and makes them pliable while they move, so the leather grows into the shape your foot gives it. The caveats: it only works on smooth, finished-dye leathers, it can dry out the leather and lighten it, and it does nothing for suede. Use it on one small area first, never more than two or three times in the life of a shoe.
The second is a hair dryer on its lowest heat setting, held about 20 cm away, worn with socks on your foot inside the shoe. Warm leather stretches, and heat plus movement is the fastest combo available at home. Keep it moving, keep it distant, and stop the moment the leather feels hot rather than warm. Hair dryers, radiators and parked cars are how people crack a vamp in a single afternoon.
One warning: if you oil one shoe and not the other, you get a visible mismatch. Do both, back to back, and use the same amount on each.
4. Test the Fit Indoors on Carpet
Do this on carpet or another non-slip surface, in the socks you would actually wear outdoors, and walk for five to ten minutes. Carpet gives you two things at once: grip while the leather is still slick with conditioner, and no slipper or scuff marks on a new upper.
Check three things as you walk. You should have roughly a thumb’s width between your longest toe and the front of the shoe. Your heel should lift slightly, because it is supposed to rise with each step, but not enough that the shoe slides away from you. And nothing should pinch sharply enough to make you change your stride.
Where it hurts tells you what to fix. Nearly every new-shoe complaint is one of these five, and each one has its own answer.
- Heel slides with every step: the counter is not moulded yet and there is no grip between the shoe and your sock. Stick a heel grip inside the back, wear the thicker socks, and use a tree between wears. If the heel still lifts after three weeks of wear, it is a size problem.
- Toe box pinches: use a shoe stretcher with a toe piece for a few hours at a time, or a stretching spray on the inside of the toe box, then walk it out immediately.
- The vamp rubs your little toe: the upper is stiff across the top of the foot while the sole is already the right width. Condition that area, then flex the vamp by hand and use a vamp stretcher. DIY users in climbing and hiking circles jam a wooden kitchen spoon into the toe box and torque it against the hot spot while the leather is warm — targeted pressure on exactly one spot, which is why it works.
- Pinching across the midfoot or instep: you have a length and girth problem, not a width problem, and stretching will not solve it. Volume-filling works better: a thicker sock, a tongue pad under the laces, or a kiltie if the shoe has laces.
- Rubbing at the ankle or the back of the Achilles: the collar and topline are stiff. Condition that strip specifically, and do not introduce new tall socks during break-in, because the height change creates a new seam to rub against.
The quickest diagnostic: take the shoes off and look at your foot, not the shoe. Redness and warmth in one spot mean a hot spot is forming. A red mark that fades within a minute is just pressure. A mark that stays and darkens means the leather has not moved yet and you need more work before the next session.
5. Follow a Gradual Wear Schedule
Short, frequent sessions beat one long one. Each 30 to 60 minutes of movement resets the fibres further than an hour of standing, because walking flexes the shoe at exactly the joints that bend when you do.
A schedule that works for most dress shoes, loafers and boots:
- Days 1 and 2: 30 to 60 minutes indoors, socks on, carpet if you have it. Nothing outside.
- Days 3 to 7: add 30 to 60 minutes a day, still indoors or a very short walk around the block. Keep the thick socks for at least the first week.
- Week 2: one full half-day of normal use. Blister protection stays on the spots that have not settled yet.
- Weeks 3 and 4: ordinary wear. Condition once more around week 3 if the leather feels tight again.
What each stage should feel like matters as much as the clock:
- Day 1: stiff, tight across the instep, heel slipping. This is normal.
- Day 3: noticeably softer at the vamp, still tight across the midfoot. Flexes more easily when you bend it in your hands.
- Week 1: creases start to set at the vamp, socks come out slightly marked, heat builds in the shoe. This is the stage where blisters start, which is why outdoor waits until here.
- Weeks 2 to 4: the shoe holds the shape of your foot, the heel counter stops moving, and the leather shows a subtle even darkening from handling and oil. That is patina starting early.
Shoe type changes the timeline, not the method. Loafers and soft Chelsea boots move fastest because they have few seams and no closed lacing. Oxfords and Derbies take a little longer because the closed lacing holds the vamp tighter. Heels need the most caution, since almost all the pressure lands on a small area under the ball of the foot. Doc Martens and other stiff work boots take weeks and are best treated with a heavier conditioning routine plus the paper-stuffing method the Doc Martens community uses, wrapped overnight so the leather absorbs it. Hiking boots follow the same arc at a larger scale, with a leather insole and shank that also have to give. Winter boots are looser than summer shoes to start, so expect to go through an entire size of socks during break-in.
If you have a date — a wedding, a first day at a new job — compress the schedule rather than skipping steps. Double up on indoor sessions in the week before, keep to shoes and short walks right up to the day, and take a heel grip and a blister balm as insurance. Buying the pair two to three months ahead of the event is the genuinely painless option.
6. Recondition and Recheck as Needed
Break-in is not one event. The leather loosens, you wear it hard, and it stiffens again as it dries out. A few habits keep it moving.
- Recondition about every two weeks during the break-in, and a few times a year afterwards. Same thin coat, same wipe-off.
- Swap the paper. Crushed tissue stops pushing, so replace it every day or two in the first week.
- Put trees in immediately after every wear, including the first few. They absorb moisture and hold the counter. Skip them and the heel counter slowly collapses and the shoe fits worse than it did on day one.
- Rotate. Alternate pairs across the week so the same leather is not flexed two days running.
- Wait on protector spray until the break-in is done, then apply two thin coats. It seals the leather against water and stains.
- Clean the dust off weekly with a soft brush. Grit is what wears creases rough.
Expect the shoes to look different when you are done, and do not read that as damage. Temporary creasing at the vamp, an even darkening from conditioner, and a slightly uneven sheen are all normal. Genuinely uneven darkening usually means one shoe got more oil than the other.
If a single spot is still punishing after three to four weeks of honest sessions, stop breaking in and stretch it. A cobbler can stretch leather locally, and plenty of shops will do it free if you bought the pair there. That is a far better outcome than wearing the shoes until they ruin your feet.
Common Mistakes
Almost every ruined pair of new leather shoes comes from one of these. The list matters because several of them are famous household fixes that do real damage.
- Soaking the shoes in water. Soaked leather can swell unevenly, stain, and take days to dry. It also weakens the glue in cemented soles and can warp the shape permanently. Damp is the limit, never wet.
- Baby oil, Vaseline or petroleum jelly on the upper. These break down the leather finish, never fully wash out, and attract dust and dirt straight into the grain. Use a product made for leather.
- Mink oil on light or unfinished leather. It darkens leather dramatically and unevenly if the two shoes are not done identically. Fine on dark work boots, a mistake on cognac or tan.
- WD-40. It is a lubricant and solvent. It softens the finish, stains lighter leather and can migrate into the glue line.
- Boiling the shoes, or a hair dryer on high. Heat cracks leather, shrinks it permanently and curls seams and stitching.
- Stuffing with wet newspaper. The ink transfers, the paper dries stiff inside the shoe, and the ink and starch block the finish from breathing.
- Rice or silica as a moisture fix. Neither does anything useful for break-in, and starch from rice leaves a dull patch that is difficult to shift.
- Wearing the shoes all day on the first outing. This is the blister guarantee. Leather that has not moved yet plus a full day of walking is how people end up limping.
- Forcing tight toes. Leather stretches a few millimetres over weeks. It does not stretch across a size. Bending hard enough to crack the grain is permanent damage.
- Treating heel slippage as break-in forever. Brief heel lift is normal. A shoe that slides off your heel after three weeks, that you have to lift with your toes, or that comes loose under load is the wrong size or the wrong last. Break-in will not fix it, and enthusiasts in welted-shoe forums say the same thing: you can play games with volume and stretching, but not with a badly fitting last.
One more that is not on most lists: waxing too early. Wax sits on the surface and blocks conditioner from reaching the fibres, and it needs reheating to remove. Break the leather in first, then wax or polish.
Frequently Asked Questions
How long does it take to break in new leather shoes?
Most smooth leather dress shoes take two to four weeks. Soft loafers and Chelsea boots move fastest, usually two weeks. Oxfords, stiff work boots and anything with thick leather run three to four weeks, and suede and nubuck can run longer because they barely stretch. Boots worn in winter also take longer than summer shoes because of heavier socks. If a spot still hurts sharply after four weeks, that is a stretching job or a sizing problem, not more break-in.
Can I use baby oil or Vaseline to soften new leather shoes?
No. Petroleum-based products break down the finish on smooth leather, never fully wash out, and trap dirt in the grain. Baby oil is a household oil, not a leather product, and it darkens light leather unevenly. What you want is a cream or paste conditioner formulated for the finish, applied thinly and wiped off after 20 to 30 minutes. That rehydrates the fibres so they flex, which is what actually loosens the shoe.
What is the best way to stretch leather shoes at home?
Combine heat, moisture and pressure. Warm the tight spot with a hair dryer on its lowest setting held about 20 cm away while wearing the shoes with socks on, then walk and flex immediately so the leather grows into your foot. For a narrow toe box, a two- or three-piece shoe stretcher left in for a few hours does more than any spray. A 50/50 rubbing alcohol and water spray on smooth leather also works once or twice, but it dries the leather and can lighten it.
Should I condition suede or nubuck shoes before wearing them?
Use a suede conditioner, not a paste conditioner or mink oil, and apply it sparingly. Heavy oils flatten the nap and leave the patch looking raw and discoloured. Brush the nap back in with a suede brush once it dries. Keep in mind that suede and nubuck barely stretch at all, so the fit matters much more than the conditioning. Anything watery, including the alcohol and water trick, will stain these finishes.
Why do my new leather shoes rub even after several days?
Most often the rubbing spot is a stiff area that is not where the shoe bends when you walk, so your foot slides across it instead of flexing the leather with it. Little-toe rubs on the vamp are the classic case: the sole is already the right width while the upper is still rigid across the top of the foot. Take the shoes off and check your foot for a warm, red spot, condition that exact area, then stretch or flex it specifically. Rubbing that does not improve within a week of targeted work is a fit problem.
When is heel slippage a sizing problem rather than break-in?
Brief heel lift as you walk is normal in new shoes, because the counter is not moulded yet. Sizing trouble shows up when the heel lifts so far that the shoe slides away from your foot, when you have to lift the shoe with your toes to get it off, or when slippage is still there after three weeks of wear with heel grips in place. That usually means the shoe is too long or the last is too narrow at the back. No amount of breaking in fixes it.
Conclusion
Shape the toe box and heel counter first, condition the stiff areas next, then run a ten-minute indoor test in your real socks before you set foot outside. From there it is just short sessions with gradual increases and thick socks for the first week.
Leather does not mould to your feet overnight, and any method promising that is trading the shoe for a pair of blisters. Two to four weeks of boring, consistent sessions gives you a shoe that fits for years and looks better for having been worn.